The Alfatross

The Alfatross
The Alfatross in 1965 and 50 years later in 2016

Friday, May 30, 2014

Four States of Separation Part II (Post # 59)

Continuing with updates on progress being made with the interior, body, engine, and "little jobs" that will eventually produce a restored Alfatross, here are the last two states of separation: New Mexico and Arizona.


New Mexico


I'm still grinding along here in Santa Fe with the "little jobs."  Compared with modern cars the electrical components of The Alfatross are Stone Age technology.  I've checked out most of the relays, switches and lights, but then I encountered the 
"Trafficator." I'm talking about the little box under the dash crammed with the kind of electrical components that Thomas Edison would have immediately recognized.  It tells the lights when to act like turn signals, parking lights, or brake lights.


The  Alfatross' Trafficator box, made by Carello.  Disarmingly simple-looking on the outside . . . .

. . . but a little more complicated inside.  
A comparison with today's electrical components that handle the same functions reveals how times have changed: It's large size, complicated manufacturing procedure, and profligate use of expensive metals, are evidence of a time when labor was cheap.  But if something went wrong you could easily open the case and fix it! Today's electronic black boxes are often stamped "no user serviceable parts inside."  When it quits working, throw it away and buy another one!


Two obvious problems: one of the contacts for the solenoid in the center is bent upward, and the fine,
tightly-coiled wire to the right of the solenoid on the far right has become disconnected at its lower end.  What is it supposed to be attached to?  
When I opened up the Trafficator box I expected to see the contents all in good order, as they were in the other relays and switches.  But no such luck!  Two obvious problems jumped out at me:  an electrical connection was broken and a contact arm on one of the solenoids was bent away from its intended point of contact, rendering it useless.  
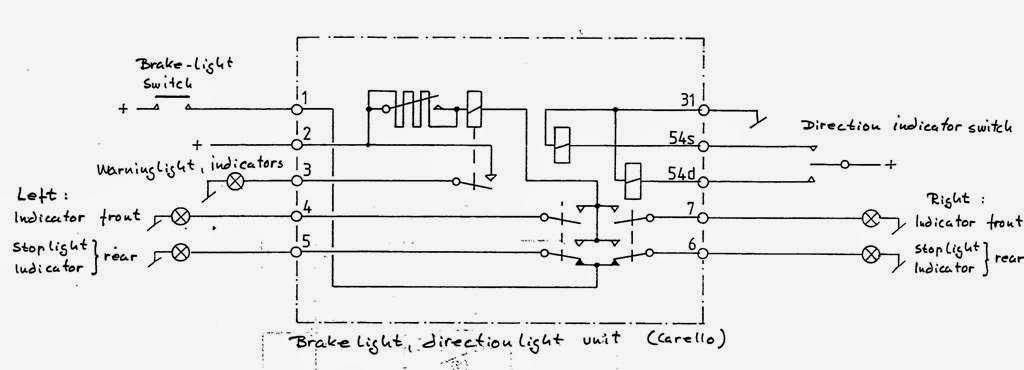

I'm sure this schematic of the trafficator will be helpful when I'm connecting it to the wiring harness, but it doesn't tell me where to attach the loose end of that fine coil of wire!

The bent contact arm I can easily fix, but I cannot figure out where to reconnect the strange hair-fine, tightly-coiled wire until I understand what it is supposed to do!  Any of you electrical engineers out there familiar with early 20th century consumer electronics should feel free to chime in on this one . . .


Arizona


DeWayne and Roger, the engine guys, seem to be satisfied with the replacement Crower cams ("way less money than the Italians and way faster delivery, plus I prefer their profile design with USA gasoline vs Italian design on EU gas").  So that issue is finally resolved.

With the block, exhaust valves, crank, head, and chain box components done they have now turned their attention to the carbs, oil lines, distributor, oil pump assembly, oil pan, water pump, block inspection ports and plating and metal finishing.  

One of the carbs had a broken shaft return spring, necessitating drilling out the frozen throttle plate screws, to replace the spring.  One accelerator pump cover was found to be cracked throughout and its activation lever bent, so it will need replacement. 


Drilling out the throttle butterflies and re-tapping them.  DeWayne Samuels.

The original Solex 40 P II carbs after cleaning.  DeWayne Samuels.

The venturies and throttle shaft.  DeWayne Samuels. 


The cleaned and prepped Solex 40 PII carbs, awaiting reassembly. DeWayne Samuels. 
Profiling the piston valve relief area is under way. When this is finished they will perform a static balance prior to a dynamic balance of the whole assembly.

One of the last hurdles is valve springs.  DeWayne says he and Roger are having a serious problem sourcing replacement valve springs.  They decided to rework the spring seat area in the cylinder head to allow 0.150” additional height in the spring package, making the spring development more feasible, but are still unhappy with the options.  So far the Italian sources they have queried are not sure they can come up with stock pressure springs, but DeWayne and Roger think that the stock springs are too weak anyway.  They found some Ferrari inner springs with a spacer but the spring rate pressure is off - which is as important or more so than the seat pressure.  The search continues . . . .

So that's the overall update for The Alfatross in its present four states of separation.

Monday, May 26, 2014

Four States of Separation Part I (Post # 58)

Now that The Alfatross is spread across 4 states from Massachusetts to Arizona, it's time for an update.   One of the things I learned along the way is that if you are restoring your car yourself (which was my original intent) YOU are in control of what gets done and when.  After it became apparent that The Alfatross is the kind of car that needs the attention of professional restorers I gave up that kind of control. The first element that I farmed out to professionals was the engine, delivered to DeWayne Samuels in Phoenix, AZ in April, 2012.  The second element was the chassis and body, which I delivered to Tim Marinos of Vintage Autocraft in Lebanon, TN, back in November, 2013. In January of this year I shipped the interior elements to Derrick Dunbar at Paul Russell & Co in Massachuttes. Meanwhile, I continue to work on the "little jobs" here in New Mexico. 


Massachusetts

Not much to report here.  The Alfatross' interior is in the capable hands of trimmer Derrick Dunbar at Paul Russell and Company.  Problem is, those hands are already full preparing interiors for cars bound for Pebble Beach that are a lot farther along than The Alfatross.  Another thing I learned along the way is that in the world of professional restorers of collector cars, the closer your car is to completion (and hence an appearance at one of the Big Three concours in the US), the more likely it is to receive attention.  So how do you get to the head of the line?

Even without having the rest of the car, there is a lot Derrick can do.  Locating exact matches for the different types of material used in the interior is perhaps the most tedious job of all, but you can't start sewing until you have the right material--or feel you have found the closest match possible.  Derrick says this is the hardest part of the job.


Tennessee

Tim Marinos and his guys have been going at The Alfatross for about 5 months now.  The steel chassis needed a lot more work than I thought.  The worst corrosion was on the top of the platform in front of the rear wheels that the rear seat cushion sit on. A leak around one of the windows allowed moisture to accumulate there during those years when the car was not regularly garaged--and we all know what standing water does to unprotected steel over time! 


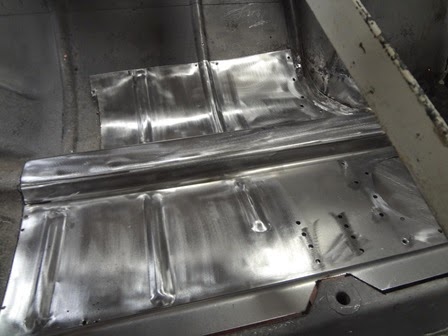
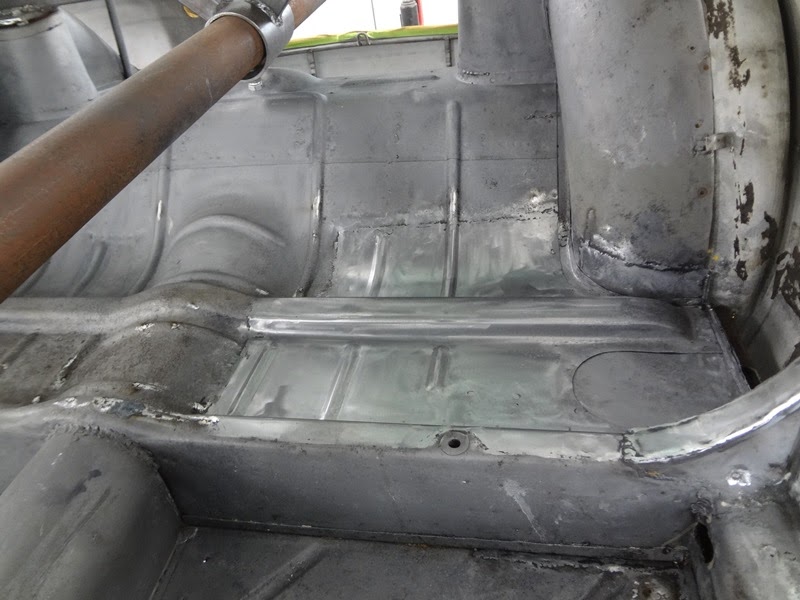
The complicated floor pan supporting the rear seat  on the driver's side had to be replicated and bead-rolled to match the surrounding contours.  Tim Marinos.
The area mentioned above after welding in place and faring in to match the surrounding panels.  Tim Marinos.

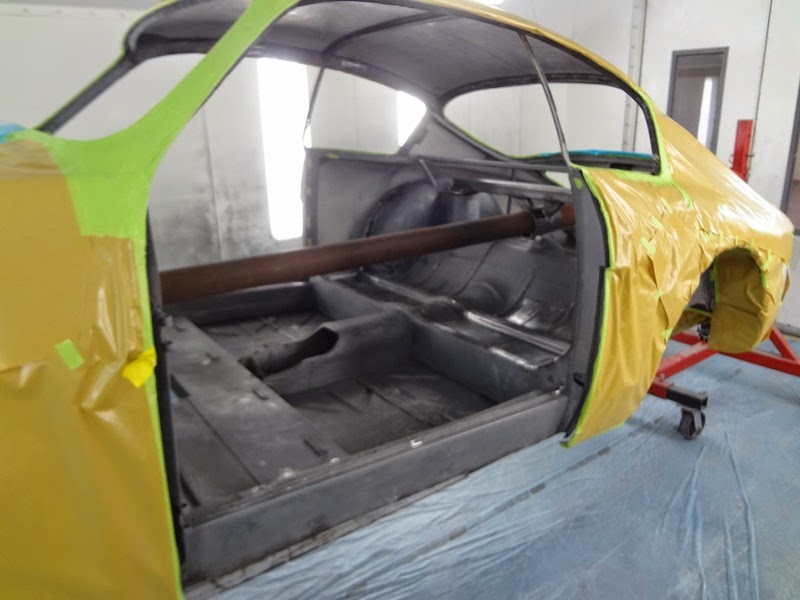
Here you can see the panels mentioned above being prepped for epoxy primer.  Work has yet to begin on the aluminum body.  Tim Marinos.


The Alfatross chassis being primed with epoxy in the paint booth following repair of rust damage.  Tim Marinos. 

The aluminum skin that forms the body of course will not need this kind of work.  But it still won't be easy to restore.  Work on the skin can't begin until the steel skeleton is straight and strong! 


I'll continue with progress reports on the "little jobs" in New Mexico and the engine in Arizona in the next post.  This one is already too long!  

Saturday, May 10, 2014

The "Little Jobs" (Post # 57)

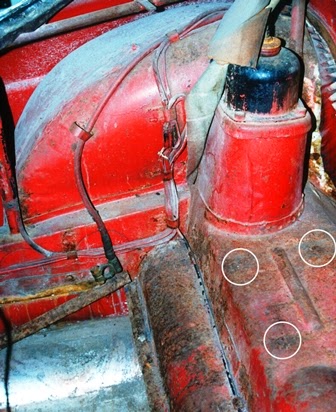
The circles indicate the locations of the fasteners that secured
the leather straps for the tool roll to the top of the rear axle
hump in the trunk.
All Alfa 1900s came with a set of tools in a canvas roll and a jack in a bag of the same material. Canvas bags and rolls wear out quickly, and the tools that used to come as standard issue with cars are often pressed into service elsewhere and quickly become separated from their rightful place.  The Alfatross had its jack and a nearly complete tool set when I got it, but no roll or bag. 


The Alfatross' original, but fragmentary straps with buckles, rivets and fasteners.
Parts of the leather straps that secured the tool roll to the rear axle hump were still there, but in poor condition.  Fortunately, the surviving parts retained the buckles and holes of various sizes showing how they were attached.  This may seem like minor details, and I notice that none of the 1900 Zagatos I have had the privilege of inspecting had their tools, tool rolls, or even straps, so maybe it isn't that important to most people--but it is to me! 
The tool roll on the left and jack bag on the right.

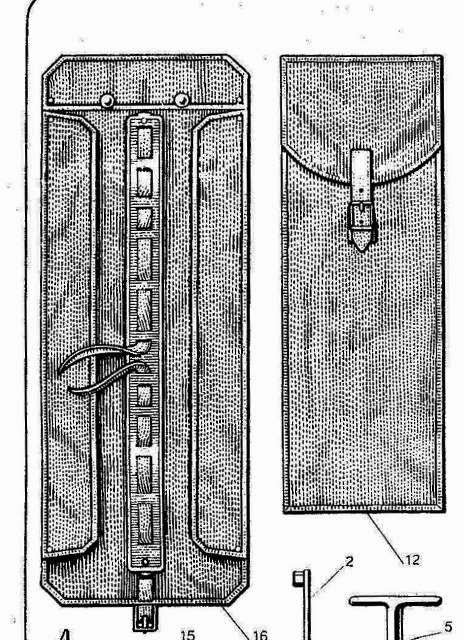
The first step was to figure out what the original tool roll and jack bag looked like.  The factory Alfa 1900 manual shows detailed images of both of them so I thought this is going to be easy.  Then I mentioned my quest to Peter Marshall and to Jason Wenig of The Creative Workshop and both of them responded with photos of original tools, tool rolls and bags--and that's when things started to get complicated.  In reality, there appears to be more than one type of tool roll.  As these photos of original rolls show, there is a "long" one and a "short" one.  The long one looks more like the illustration in the manual.  Perhaps it is longer to accommodate the hammer?

An example of a "long" tool roll with eight slots for tools and constricting bands that meet in the center, just like the illustration in the 1900 shop manual.  This particular kit is missing the valve adjustment tools and the cam cover wrench, but it has the mysterious tiny hammer--what are you supposed to do with that?  Jason Wenig.

The shorter tool roll doesn't have the constricting bands and appears to have
other internal and external difference as well.  Jason Wenig.
So this is a typical "little job," starting with research and communication and moving on to restoration for some elements and fabrication for others.  I knew that The Creative Workshop's restoration of a 1955 Alfa 1900CSS Ghia-Aigle last year included replication of an authentic tool roll and jack bag so I asked them to to make a set for me using their patterns.   


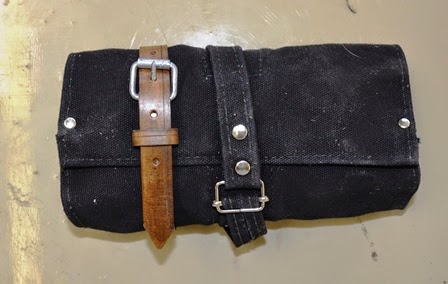
The Alfatross' tools in the "shorter" roll fabricated by The Creative Workshop.  
The raw leather strips after narrowing and before dying.

It's easy when you have the right tools!  
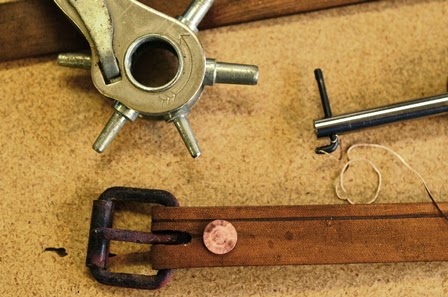
From the surviving original straps I was able to get width and thickness (2.3-2.6 mm) dimensions, but not overall length. I sourced 3/4 in. leather strips from the local Tandy Leather dealer but had to reduce their width to 18 mm and dye them to match the originals.  I noticed that there is a faint but definite decorative groove near one side of each of the original straps, so I duplicated it on the new straps using a handy-dandy grooving tool I picked up at Tandy.


The original straps give the spacing between the tie-down holes, but not
the overall length or where the tongue hole sequence should start or the
shape of the end of the strap that fits through the buckle.
The rest of the process was just a matter of duplicating the spacing of the buckle tongue slot, rivet, tie-down screw and tongue holes.  I detached the original buckles, cleaned them up, and secured them to the new straps with copper rivets.  

From the buckle rivet to the first tie-down hole on the original straps was 105 mm, with 92 mm between the first and second holes.  Stuffed with tools, the roll was 340 mm in circumference.  Because I don't have the entire length of either strap from buckle to tip, I had to guess at their overall length, where the first of the tongue holes should be placed, and how many there should be.  

The tool roll, stuffed with tools and one of the finished hold-down straps.
So much for the "small job" of restoring a part of The Alfatross that will seldom be seen by anyone--unless I have to change a tire or make a roadside repair!