The Alfatross

The Alfatross
The Alfatross in 1965 and 50 years later in 2016

Thursday, December 18, 2014

Separation Anxiety (Post # 72)

It's hard to believe that the restoration of The Alfatross began almost two years ago.  Knowing what I know now, it's even harder to believe that I ever thought it could be done in just one year!  With 2015 fast approaching it's time for updates from the guys who are working on The Alfatross' sub-assemblies. Here are their latest reports: 


The Chassis and Body (Tim Marinos at Vintage Autocraft)

The Alfatross at Vintage Autocraft.  Tim Marinos
"Zagato built beautiful car bodies but was not well known for exceptional fit and finish.  I heard a restorer tell his customer, 'The great thing is it’s a Zagato' and in the same breath, 'The difficult thing is that it’s a Zagato.' 
"The good news is, it's a Zagato.  The bad news is . . . . " 

The hood skin minus its steel framework.  Tim Marinos.


With the vast majority of the underbody repairs to The Alfatross complete, we now focus on fitting the body components. One of the more tedious aspects of the restoration process is repairing past “sins” or issues such as poor build quality, poor repair methods, and existing damage and decay. This requires repairing and fitting up virtually every part pertaining to the body: all open and shut panels, window mechanisms, latches, trim, bright work etc. Rubber seals must be sourced, fitted and modified or made if an original style is not available. 

The hood skin with frame reattached.  Tim Marinos.


Every screw hole must be checked, re-welded if needed and sized for the correct hardware. During final assembly is not the time to deal with stripped out 2.9 mm trim screw holes! The extra effort spent at this stage returns in spades down the home stretch in terms of time and stress.

We must always be aware of the need to maintain a balance between fixing poor build quality issues and over-restoring. I always go back to the intent of the builder and take it to the highest level which is evident that they could achieve over all. This is the course we are following with The Alfatross."


The Engine (DeWayne Samuels, Samuels Speed Technologies)


The water pump housing.  DeWayne Samuels.
The shaft, bearing, impeller, seal and spring after
restoration.  DeWayne Samuels.
"Supplied water pump assembly was disassembled and initially cleaned and inspected. The housing had very bad corrosion creating porosity and pitting requiring chemical and glass bead abrasion to clean the metal enabling the surface to be ground to clean metal and prepared for welding. 


Various areas, especially at the radiator coolant supply hose bib, required multiple weld passes with shaping and re-welding to restructure the unit's integrity and restore the housing's original shape. 
Corrosion on the hose bib required building up and
grinding back into shape.  DeWayne Samuels.
Water pump restored and ready for installation.
DeWayne Samuels.
Once the porosity and corrosion problems were corrected; the entire internal surface in contact with coolant was coated with a protective sealant. The mating surface in contact with the engine block was machined flat as it too had porosity and corrosion problems. The new bearing assembly was modified to accept the fan pulley and machined to the proper length for the Zagato setup. 


The new bearing assembly was then pressed into the housing along with anew carbon dynamic seal assembly.  The coolant impeller was pressed into place with attention given to proper seal spring compression height and impeller clearance with the housing vortex seat. The unit is now ready to accept the fan pulley and awaits installation."


The Interior (Derrick Dunbar, Paul Russell and Company)


Body color overspray on the vinyl trim of the back seat
panel.  Derrick Dunbar.
"I am sending you three photographs of the material that came off the back panel of your rear backrest.  If you look closely you will it has some overspray residue on the vinyl edges where it wraps around the back panel.  This is evidence that the body was sprayed while in the car at the factory. Because the restoration calls for replacement of this piece of vinyl, we can either duplicate the overspray to preserve the way it was done at the factory, or leave it clean. Let me know what you want us to do".    
The back seat backrest panel.  Derrick Dunbar


One of the black vinyl quilting panels that cover the fire-
wall.  Derrick Dunbar.


The front seat backs and frames being reupholstered.
Derrick Dunbar.


The black quilting is your original that has been cleaned and dyed,  and the red wooden reinforcements on the underside of the parcel shelf are also originals.  If anything can be salvaged I like to retain it."


Everything Else (Me, Steward for The Alfatross)

When the body and chassis come back to Santa Fe I need to be ready to install all the other components except the upholstery.   Many of them are compete, but there is still plenty left to do.   Jeff Kramer, The Alfatross' chief Web scrounger, recently sent me a link to an ebay ad by Luma di Mazzotti Gianluca for a complete original Alfa 1900 radiator, thermostat, shutter and linkage assembly.  I didn't really need the radiator or shutter, but the thermostat and its intricate linkage alone were worth the purchase. Incredibly, it arrived less than a week later!

The radiator from The Alfatross (right) dwarfs the one
just received from Italy.


I was surprised to discover that the radiator and shutter were shorter than the Alfatross', although the other dimensions were the same.  It made me wonder if Alfa supplied different radiator types for different engines, or whether different body shapes required lower radiator height.
The shutters are sized proportionately.


The wiring harness laid out for testing.  Front of the car is at the top.
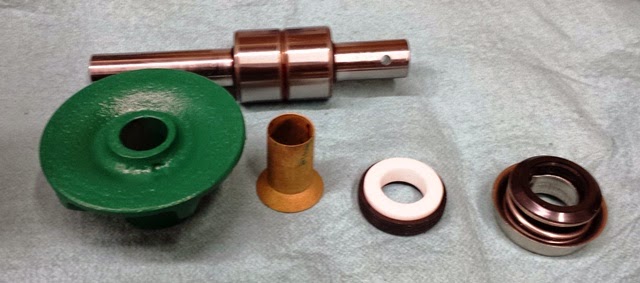
One of the other facets of the restoration I'm working on now is the wiring harness.  I had the original duplicated years ago by YnZ's Yesterday's Parts, but until now it had never been laid out.  My intent is to test each circuit and each electrical component to make sure they are functional before installing the harness in the car.  Although the harness and components are relatively simple, there are plenty of opportunities to get wires crossed.  Fortunately, YnZ numbered each wire and supplied 4 pages of notes on what they connect to based on the labels I attached when I removed the original harness and on their years of experience with this sort of thing.  I also had 9 pages of schematics sent to me decades ago by Berge Bergesen, another 1900 Z owner and notes by Peter Marshall on how to improve the exterior lighting system.

Things get a little complicated in the vicinity of the dashboard.

Separation Anxiety

I have to admit to being anxious about how long this restoration is taking.  I am well aware that The Alfatross is not the only car these guys (even me!) are working on, or even their highest priority (except for me!).  Over the 45 years I have been taking care of The Alfatross my experience with contractors has ranged from utter frustration with charlatans to mild amusement over some of the citations from The Book of Excuses I have been offered, to a sense of awe at the knowledge and competence demonstrated by the true professionals.  

If I ever do this again I will definitely establish agreements with anyone I contract with for when their part of the job will be finished.  If a potential contractor cannot or will not do that I will look elsewhere. 


Friday, December 5, 2014

Because of a Nail . . . . (Post # 71)

Because of a nail the shoe was lost, 
Because of the shoe the horse was lost, 
Because of the horse the knight was lost,
Because of the knight the battle was lost 
And because of the battle the kingdom was lost!

The Alfatross in 1969.  The trim ring is missing
from the passenger side headlight.
Chassis 01848 missing trim ring and headlight
lens. www.alfa1900.com.

What do nails, horses, knights, battles, and kingdoms have to do with the Alfatross? Well . . . read on!

The Alfatross was missing the trim ring around the passenger's side headlight when I bought it. OK, big deal, part missing, add it to the list! All I have to do is find another one . . .  or so I thought!
Beautiful car, but where is the trim ring
around the headlight? Michael Marciano.


The culprits: three simple spring steel clips susceptible to
breaking.  
It turned out that finding a replacement trim ring was not as difficult as determining WHY the original was lost in the first place. Headlight trim rings don't just fall off, even during competition or when being chased at high speed by the Polizia.  I noticed that at least a couple of The Alfatross' brethren were also missing their trim rings, so there seemed to be a pattern.  

There is always a reason, but it isn't always obvious. This time it was!  After cleaning the headlight buckets it was apparent that the one on the passenger side was missing two of the three clips that hold the trim ring to the bucket. And the driver side was missing one too.  

In my imagination I could see the series of events leading up to the loss of the trim rings: First, the headlight bulb burns out. The ring has to come off before the lens can be removed.  The person doing the work can't see what is holding the ring on or how to get it off (it isn't intuitive!) and breaks one or more of the clips before finally getting the ring off.  Now there is nothing to hold it in place, so either it isn't replaced, or it is jury rigged and falls off later. 


The exploded view diagram of the Carello headlight assembly for The Alfatross (top).  No. 14 in the diagram, "chiavistello" is the clip, or "latch" that holds the trim ring to the bucket, three per bucket.  Lose two and the ring will not hold!  Peter Marshall.

Looking at the headlight parts catalog sheet Peter Marshall send me years ago I made a feeble attempt to find replacement clips on line using the part number and description. It didn't take long to conclude that there probably isn't a stash of chiavistello "latches" left anywhere on earth so I better get busy making my own.  

I removed one of the three surviving clips still in good condition and took its dimensions. The problem was going to be finding spring steel of the right gauge to duplicate the example.  Shaping, drilling and bending it and would be easy (I thought!).


The nail that lost the shoe!  The 35 mm long, 
24 gauge, spring steel clip.  Try finding this 
on ebay!


The spring steel donor: a 
common paint scraper that 
just happens to be 24 gauge.
Cutting the spring steel blank with an abrasive wheel on
a Dremel tool.  Given the small size of the blank, sawing 
was impractical. 


I tried a number of pieces of scrap metal and saw blades before Jeff Kramer handed me a common paint scraper and said "Why don't you try this?" The blade turned out to be exactly the right gauge and large enough to make 5 or 6 blanks to allow for experimentation.  


Heating the spring steel blank with a MAPP gas torch 
in preparation for bending.


Finishing a new retainer clip on the sanding wheel.  The 
pointed tip must have exactly the right shape or it will be
difficult (impossible?) to get the trim ring off again!
I won't elaborate on all the things that can go wrong when you're cutting, shaping, drilling, heating, bending and grinding pieces of spring steel that are about an inch and a half long, but rest assured that Jeff and I discovered them all.  


One of the fabricated clips (top) with the original example.

This exercise is a good example of why car restoration is so time- and labor-consuming and hence so costly.  The materials in this case cost virtually nothing, but it took days of labor to restore critical parts that may never be seen again.

. . . and all because a tiny piece of steel--about the size of a small horseshoe nail--was lost .  . . .