The Alfatross

The Alfatross
The Alfatross in 1965 and 50 years later in 2016

Tuesday, April 30, 2013

No Pressure! (Post # 26)

The pressure is on! And it's such a relief!

A few weeks ago the blog was all about finally getting the Alfatross up on the rotisserie so it could be soda blasted and move to the next preparation stage.  This post is about why it has taken so long to get back to that. Soda blasting needs three things: soda, a rotisserie, and plenty of compressed air.  Make that four things: add cooperative weather.  A month ago I had all four--briefly--and the result was rapid progress stripping the old paint and filler off the Alfatross' body.  But the diesel-powered compressor was rented ($200/day!) and this time of year in Northern New Mexico the weather can't decide if it is winter or summer.  The only thing you can count on is the wind: plenty of it and all day long.

Suffice it to say that there were delays . . . .


So this is what I went to school all those years for?

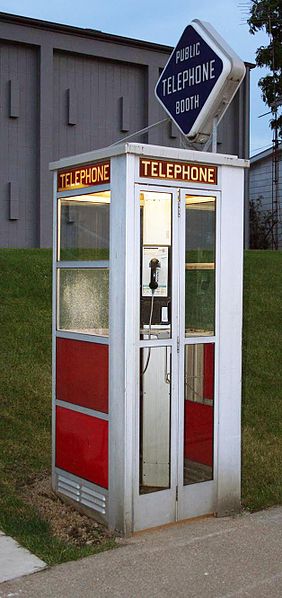
Speaking of wind, I knew I needed to replace my aging, feeble, low-volume, low pressure reciprocating air compressor with something more robust.  Soda blasting doesn't need all that much pressure, maybe only about 100 PSI.  But it does need volume--like something north of 30 CFM!  Just to put that in perspective, a telephone booth (anybody still remember them?) has a volume of about 80 cubic feet.  So a compressor capable of producing 30 cubic feet of air per minute at 100 PSI (which is 6.8 times normal air pressure at sea level) could fill 2 1/3 telephone booths per minute.  It would take you about 5 hours to breath that much air . . . and the compressor has to make it in one minute!

File:ClassicTelephoneBooth.jpgOK, that didn't sound as impressive as I thought it would. What IS impressive is what compressors like that cost! In the first place volume and pressure are only two of many considerations when you're compressor shopping. The next consideration in importance for me was noise.

Your typical "reciprocating" shop compressor uses an electric motor to move pistons or diaphragms to compress air, like an internal combustion engine turning over on its electric starter before ignition takes place. They can be deafening.

Other considerations include power consumption (or "efficiency"), space needed, configuration of storage tank (vertical or horizontal), duty cycle design specification, and of course maintenance costs. 

Reciprocating and "rotary screw" compressors are the most common types, but I ran across another variant called "Hydrovane" that intrigued me.  Reciprocating compressors that would do the job were out of the question because the racket they would make in my little shop would be unbearable.  Rotary screw jobs are great, but one that could make the pressure and volume I was looking for would cost close to $10,000!  The hydrovane boasted direct drive (no belts), low rotational speed, low noise, continuous duty, improved efficiency over time (!?), and lower cost (more like $4,000 before shipping, etc.). 

I was immediately attracted to the Hydrovane principle because it reminded me of the rotary engine in my Mazda RX-8 in reverse. In both cases you have rotors instead of pistons as the only moving parts,and chambers instead of cylinders (the Hydrovane calls them "stators").

Schematic of the Hydrovane principle.  The rotor is in the center, mounted
off-center in the stator.  It is the only moving part unless you count the
vanes moving in and out of their slots under centrifugal force.


After talking to the local distributor, Brian Page of WISCO Supply, Inc., I was sold.  It arrived about three weeks later in an 18-wheeler that somehow found its way to my shop.  You can't just plug one of these babies in.  When I built the shop I anticipated needing a couple of 220v outlets, but I still needed Manuel Serrano to wire it in, install a cutoff switch box and breakers. 

Here's where it gets interesting.  His guys did the job in 2 hours, but I still had to wait for WISCO to send a start up team up from Albuquerque to look the system over for warranty purposes. 

Miguel Serrano's guys swarming all over the Hydrovane, wiring it in to code.  220V appliances need to be taken seriously!
Long story short, WISCO's guys drove the 70 miles up from Albuquerque, inspected everything, threw the switch--and promptly blew the two gigantic main fuses in the compressor's control box!  Turns out they were special.  You can't find fuses like that in Santa Fe. So they drove the 70 miles back to Albuquerque and returned the next day with the proper replacements.  After mulling things over, they realized that Serrano's electricians had connected line power to the wrong place in the control box.  I don't know why they missed that the first time.  They rewired it, threw the switch again--and the Hydrovane sprang to life at last!  It was smooth, it was quiet, and automatically cut off at 150 PSI.  Perfect--except for the fact that I had to pay twice as much for the electrical work done by two different groups of electricians, each of which made bad mistakes. 

Maybe they both should advertise: "We charge twice as much to do it wrong the first time!"

Caveat Emptor!

Ready for action at last.  More power!  More air!  Small footprint and very quiet.  Highly recommended--just make sure it's
wired in right to start with!

Tuesday, April 23, 2013

The Alfatross meets The Phoenix (Post # 25)

So you're restoring your old car.  You can do a lot of the scut work yourself: disassembly, assembly, cleaning, polishing, painting some of the small parts, etc.  But there are a lot of tasks that require special tools, knowledge, and experience.  The last post about the electric fuel pump was a good example.  There are many more such tasks from wire wheel renovation to replicating the wiring harness.  But the three 800-lb gorillas in the room are the engine, the interior, and the body. 

Phoenix, Arizona, built on the ruins of the ancient Hohokam
 culture, was named for the mythical bird that rose from its
own ashes to live again. 
Phoenix, Arizona is a good place for an old Alfatross to rise from its own ashes and live again.  That's where I went last week.  Not only is Phoenix steeped in the American Car Culture and home of the most famous car auctions in the world (last winter sales totalled $225 million!), but also a great place to find specialist car services. 

The Alfatross's connection with The Phoenix started in 2004 when I invited Rich Heinrich to visit us in Corpus Christi.  He worked for a private car collection in Phoenix where he was tasked with the restoration of another Alfa SSZ like mine.  Because the Alfatross was more complete he could take photos and measurements that would result in a better restoration of the car he was working on. 

We kept in touch over the years.  Every time I was in Phoenix I made a point of visiting him and the other guys working in the restoration shop attached to the private collection.  When it came time to get serious about restoring the Alfatraoss I went to them for advice.  After a very disappointing experience with an alleged Alfa 1900 engine specialist in St. Louis, I decided last year to take my engine to DeWayne Samuels, one of Rich's co-workers in Phoenix. 

Last week I flew down to Phoenix to check on the progress being made on the engine, and while I was there, look for a shop that could paint the Alfatross's body.  I was met at the airport by my old schoolmate Dr. Randy Davis, who volunteered to be the wheel man for a long day of fighting traffic from one end of Phoenix to the other and back again.   The first stop was Roger Lorton's Standard Machine, LLC.  There, the engine was completely disassembled, cleaned, and evaluated.  It was time to make sure Roger, DeWayne and I were all on the same page with respect to concerns such as originality, performance upgrades, and appearance.  As expected, the engine needs some machine work and new parts: new exhaust valves and pistons, and machining of the valves, valve seats, and possibly crank.  The good news is that the block, head, and connecting rods are all OK along with the cam chain and oil pump gears.  How long will it take and what will it cost?  Still too soon to tell.

Roger Lorton with one of the many special machines used for precision seating of valves in a cylinder head.  Note the "floating" base.  Roger and DeWayne have worked together on various engine restoration projects over the years ranging from big-block V-8s to a straight-8 Bugatti!

The Aflatross's 58 year-old aluminum cylinder head.  Condition is pretty good except for some minor scaring in one of the
combustion chambers.  I have new intake valves already, but will need a new set of exhaust valves.

The crank is in pretty good condition too, but the main bearing surfaces all show varying degrees of wear and will have to  be hard-chromed.  New pistons will have to be fabricated.  Balance has yet to be checked.
I wasn't looking forward to the other item on my list, finding a shop that could give the Alfa a great paint job.  Most body shops only accept insurance repair work, so what we were looking for was something completely different and a lot harder to find.  Rich suggested that we pay a visit to Young Guns Designs (http://younggunsdesigns.com/).  There we met the owners, Tyler Tibbits and John Pollock, who spent more than an hour taking us through their facility.  Unfortunately, I didn't have my camera so I have no photos to post, but their Web site and numerous You Tube segments will give you a good idea of what they can do.  We were very impressed by their facility, professionalism, enthusiasm, experience, and raw talent. 

I will have to send photos and documents to familiarize them with the Alfatross, my schedule, and expectations so they can mull it over before going any farther. 

The Phoenix keeps calling The Alfatross.  Perhaps one day the Alfatross will be part of the auction scene in nearby Scottsdale . . . .


Tuesday, April 16, 2013

Giving It the Gas Post # 24)

The Alfatross has two fuel pumps: an electric SU pump mounted under the car near the fuel tank and a mechanical FISPA pump mounted on the right side of the engine.  Both were in pretty good condition other than having old, hard diaphragms and gaskets.  The latter, being simple and mechanical, was easy to restore, but the SU was another story.  In the first place, it had a lot of parts. 

The SU fuel pump is a beautiful device, but subject to
failure of the electrical contact points switch.
I surfed the Internet looking for specifications and parts for SU pumps and discovered Dave DuBois at SU Fuel Pumps and More (http://homepages.donobi.net/sufuelpumps/).  After reading his articles on SU fuel pumps I realized that not only could Dave supply the parts I needed, but could also replace the original stone-age "contact points" technology with an optical triggering device that would dead-reliable. 

I sent my pump to Dave and it was one of the best experiences I have had with sub-contractors.  The information about SU pumps on his Web site is encyclopedic.  He tells you exactly what your pump needs and what he will do to restore it.  He tells you how your pump will be tested following restoration and that he keeps a copy of the data on your pump on file for future reference.  The prices for his services are clearly stated, along with shipping charges and optional insurance.

For me, the icing on the cake was the photo of Dave's testing station.  I always ask sub-contractors to provide a photo or two of their workshop, just to have a more complete record of all the work that is being done on the Alfatross's parts outside my own workshop.  Most of them don't do it.  I don't know why, in this day and age of cell phone cameras, they can't be bothered to send back a snap or two along with the item they're restoring, but they don't.  Anyway, Dave has that covered, too.


Dave DuBois' test station.  Impressive!

Dave's solid-state replacement for the original points. 
This type of modification during restoration is in line with my overall restoration philosophy: yes, it is a departure from 100% originality, but it is unobtrusive, undetectable, and it improves reliability.  For me this is an acceptable compromise. 

The finished electric fuel pump, tested and ready for installation.

So my pump was returned run-tested and in better-than-new condition.  It has a one year warranty on parts and a lifetime warranty on labor!  All this for just $121.62 including shipping, or $127.32 if you want the  $400 insurance option (as of 2012).  He also lists other SU repair services you can contact in the US, the UK, and Australia.  Now that's the kind of contractor you want to deal with.

Thanks, Dave!

Tuesday, April 9, 2013

Carchaeology (Post # 23)

Almost every day I am reminded of the parallels between archaeology, my vocation, and carchaeology, my avocation.  the similarities are broad and deep.  Broad in the sense that both deal with old objects that need to be researched and restored so you can show them to the public and explain their significance.  Deep in the sense that the physical and chemical processes involved in stabilizing the artifact and preventing further deterioration are exactly the same.  Then there is the element of research.  In both archaeology and carchaeology we are dealing with things made in the past that we are bringing back to life. 

Archaeology

Most of our archaeological work involves objects that have been submerged in seawater for centuries, like the cannon below.  That's a pretty harsh environment but under the right conditions all sorts of things can survive in surprisingly good condition.  We call the condition they are in when found their "state of preservation."  We call what we do to the objects after recovering them from the sea "conservation treatment."  Different materials require completely different types of conservation treatments.  All of this applies to old cars as well. 

A bronze cannon fresh from a shipwreck site in its natural "state of preservation."

The same cannon months later following extensive conservation treatments
including pressure-washing and electrolytic reduction .
What do you do when you have an important artifact but parts of it are missing?  This is where research comes in.  The bronze cannon provides a good archaeological example.  The cannon was in great shape, but the iron, wood, and rope artifacts that made up the cannon carriage were gone.  We knew that in order to maximize the visual and educational impact of the cannon we would need to reproduce the missing pieces.  Using construction plans for cannon carriages of the period found in French archives we were able to replicate all the missing pieces authentically. 

The same cannon months later, after extensive historical research enabled
us to replicate the carriage, ropes, pulleys, iron hardware, deck and
gun port necessary to put the cannon in its proper context.

Carchaeology

An old car is like an archaeological site. All its bits and pieces are the individual "artifacts" that make up the "site."  Before going to the trouble and expense of restoring a car, the carchaeologist, just like the archaeologist, should have a pretty good idea of what the final product will be.  If not, there is a good chance the project will drift toward the path of least resistance and lose sight of the goal.

I'm at the stage now where I cannot proceed without finalizing my vision for the Alfatross' future. Because the Alfatross is already well on its way to some form of restoration, and the "preservation" mode is not an option, there are three basic paths to follow:
  1. Restore for concours competition,
  2. Restore to a somewhat lower standard for participation in actual classic car driving events,
  3. Or restore and modify to suit my own personal driving and enjoyment preferences.


Option 1 is to restore the Alfatross to a very high standard down to the last nut
and bolt, foregoing performance upgrades and interior embellishments,
establish its previous competition history (if any) and actually drive it
as little as possible.

Option 2 is to prepare the Alfatross for long-distance vintage racing  and
rallying.  Emphasis would be on a reliable, powerful engine, strong suspension
and brakes and driver comfort.

Option 3 is "suit yourself!" Would a small block V8 fit in the engine room? 
How about some 18-inch mag wheels with fat tires?
In all honesty, Options 1 and 3 are not attractive to me.  Judging from the results of concours events I am familiar with, the Alfatross just isn't a good candidate.  Sure, 1900C SSZs are elegant and rare, but underneath that sexy Zagato body they're pretty plain and simple, particularly the interiors.  They weren't star race-winners in period, either.  I'm still not sure how the Alfatross' authenticity compares with its brethren.  It is the most original of the examples I have seen, but there are many that I haven't. 

Option 3 is equally unappealing for the simple reason that the Alfatross is an important artifact--part of automotive history and design--and as such I am responsible for preserving its integrity until it passes to the next owner.  So no hot-rodding allowed!

That leaves Option 2 as the best course for me to follow with the Alfatross' restoration.  It also seems to have been the same choice that many other owners of 1900 Zagatos have made.  So the goals for the Alfatross are going to be :
  • restore and re-use original parts wherever possible
  • replace original parts where function or safety may be compromised (rubber brake lines,brake shoes, tires, Plexiglas windows)
  • duplicate original finishes and materials where originals have deteriorated (paint, upholstery, Plexiglas, rubber and plastic) 
  • rebuild engine, drive train and brakes with attention to robustness
  • research and document history 
So now that we have a goal . . . back to work!

Tuesday, April 2, 2013

Keeping Cool (Post # 22)

What takes the most time in a restoration?  A lot of categories vie for that honor, but at the moment I would say it is "details."  If you pay attention to the details and do things right, it will be worth it later on, but while you're actually doing it there is a little voice whispering "Is this really necessary?"  Who is ever going to see it, and even if they do, how would they know the difference?

Case in point is the harmless-looking widget below.  When I disassembled the engine room it was embedded in the top tank of the Alfatross' radiator with just the small shaft sticking out.   What the . . . ?   Immediately in front of the radiator was a louvered frame, obviously meant to open and close to assist warming up the engine.  A rod on a pivot was attached to the middle of the top louver and the others were linked to it to follow its motion.  I reasoned that the widget had at one time been connected somehow to the louvers, but there was nothing there now.  The louvers were wired up in the full open position.

The radiator widget.  The numbers in the upper left corner of this photo are
stamped into the bronze body.  IPRA is probably the manufacturer.  The  "4"
above is probably a size and the numbers below are probably the temperature
ranges at which it opens and closes the louvers as the
water in the radiator warms up.

Here's the louver frame that sat in front of the radiator.  The rod in the middle
of the top louver was intact, but how did it connect to the widget?
For many years I was at a loss to find a replacement widget or figure out how the linkage between it and the louver box worked.  The breakthrough came when I saw the car below at a show in 2002.  It had only recently come to light and was on display as an exciting new "barn find."  While other spectators were admiring the remarkably intact interior and engine room, I was peering through the narrow openings in the nose to see if the louver actuating linkage was still there.  It was!

The car that solved the mystery.
Normally, it would have been impossible to photograph the linkage, but as luck would have it the car was missing the grill frames on either side of the central grill and the unobstructed openings were just big enough to get my digital camera inside.  The photos revealed that the linkage was intact and operational, which was great, but also that it consisted of no less than 9 parts and was not the sort of thing that could be duplicated from photos alone. 

Here is the 9-part linkage in the barn find car.  The widget is invisible inside the
radiator.  As the coolant in the radiator heats up, something inside the widget
 expands and pushes the end shaft out against a roller mounted on the lever arm.
 The spring helps to push the end shaft back into the widget as the radiator cools.
I figured that finding an intact, operational, linkage assembly like this was unlikely, but maybe the owner of this car would be willing to take it off and send it to me so I could duplicate it for my car-especially if I sent him my front grill frames so he could duplicate them for his car!  And that's exactly what we did. 

In addition to lots of photos shot from every angle, it was critical to record all the dimensions and types
of metals used: bronze for the lever arm, spring steel for the spring, brass for the rivets, mild steel
for the cotter keys, and hard steel for the roller and axle.


Recording the linkage assembly was the easy part.  Making it was hard.  The lever arm was the hardest part to duplicate because it was a solid piece that had to be cast.  I didn't want to send the original to a foundry, so in addition to photographs and dimensions, I also made a mold of the roller and lever arm assembly and cast it in resin.  I sent this to the foundry for final casting.


The resin cast of the lever arm that was sent to the foundry for duplication in
bronze. 
The next challenge was the spring.  I knew I couldn't do this myself, so I farmed it out to a specialty spring maker in Corpus Christi.  I was astounded at the cost estimate: $250!   It was the last spring they ever made.  When I went to pick it up the owner was locking the doors and closing up shop for good.  I guess that even at $250 each the specialty spring market is pretty thin.

How do you measure a spring, anyway?  The important is figuring out its "springiness"
So the Devil really is in the details.  All this, spread out over about 10 years, for a part that would fit in the palm of your hand, a part that the car really doesn't have to have and few would notice the difference if it didn't . . .

. . .  and I'm still trying to figure out how to open the widget to rebuild it!