
 |
| Leading the pack on a glorious New Mexico morning. |
 |
| It works, but is it worth it? |
According to “The Plan”, The Alfatross and I were supposed to be on the road now, working on refining suspension, steering, engine tuning, and all things related to testing road worthiness. Instead, we are both here in The Shed, me flossing fins on her radiator with pipe cleaners and she impatiently waiting for me to fix everything so she can get back on the road.
Do you know how many fins there are on a 1900C SS radiator? I do: Cleaning fins is hard work. It helps to pass the time by practicing your math skills. It also helps explain why it takes so long.
Radiator core area = 39.5H X 44L =1,738 cm sq. (one side)
Radiator core fin rows = ca. 4 fins/cm = 158/side
Total length of fins, (both sides) = 158/side X 44 cm X 2 = 13,904 cm
Radiator core tubes (columns) = 28
I mention how many core tubes there are because they break up the 158 rows of fins into 4,424 discrete cleaning areas (each side), thereby compounding the effort it takes to clean them!
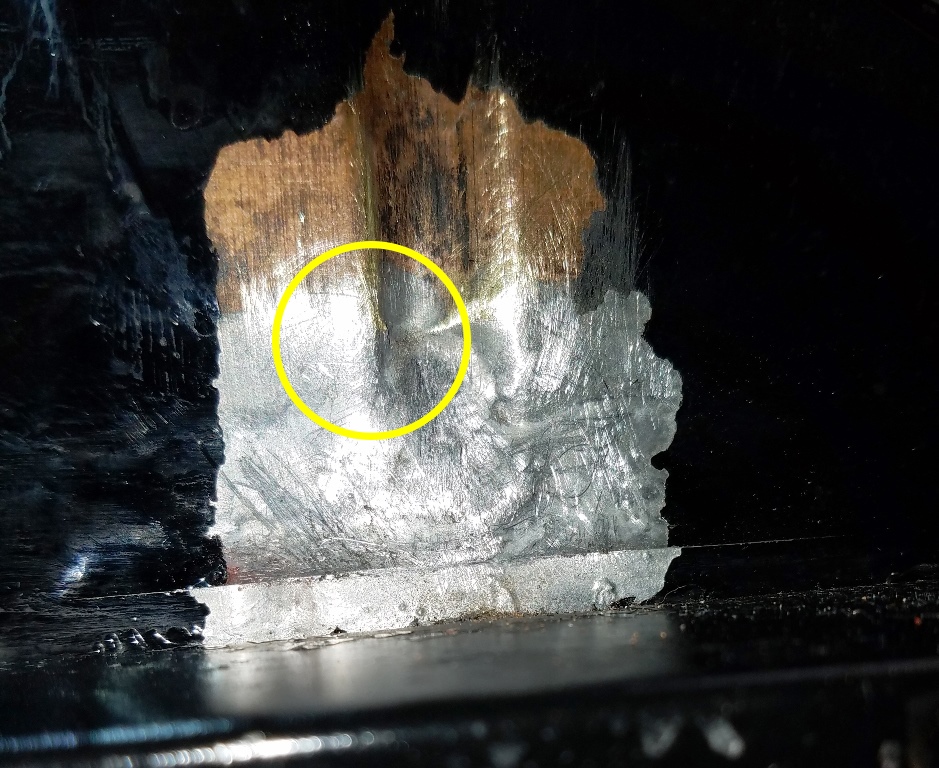 |
| Virtually invisible, the tiny crack is in the center of the circle. |
The delightful opportunity to
clean fins was one of those “well, as long as the radiator is out I might as well go ahead and . . . . But why is it out? This most recent
departure from The Plan, was prompted by the sudden appearance of a radiator
leak. Fortunately, it occurred not on the road, but while testing instrument
readings at The Shed. Unfortunately, it is still a major bummer, particularly
because I pressure-tested the radiator after re-coring and before installation
several years ago. The leak appeared as a fine spray of coolant coming from the
front of the radiator near the top of the head tank. With the hood off and the
engine running, I could see the exact location and snap a photo.
 |
| Angling the radiator and shutter assemblies out together. |
After sanding the area down to bare metal, I could see what appeared to be an ultra-fine crack at the edge of the soldered joint between the head tank and the new core. After much head-scratching I concluded the best idea would be to remove the radiator, patch the leak, and pressure test it out of the car again in case there might be other weak spots. After all, although the core is new, the tanks are 65 years old!
Andrea Zagato once described the body for the Alfa 1900C SSZ designed by his grandfather as “draped” over the engine and frame . . . and I agree it is a voluptuously seductive design. But . . . just try to get the radiator out without removing the engine first! Tucked up under the car’s nose, it is also firmly attached to the shutter mechanism in front of it that warms the engine up, making the combined assembly twice as thick.
 |
| The thermostat functioned perfectly. |
 |
| So . . . it is possible after all! |
 |
| The glossy epoxy patch material matches the radiator's finish. |
More soul-searching led to the conclusion that there would never be another chance to clean the fins once the radiator goes back in the car, so it’s now or never. It does not have to be spotless, and the front side can’t even be seen once the shutter is in place, so it really isn’t a big deal.
It's just frustrating to be removing, patching, cleaning and reinstalling the radiator when on the other side of the overhead door, Legendary Route 66 beckons!