The Alfatross

The Alfatross
The Alfatross in 1965 and 50 years later in 2016

Monday, December 26, 2016

Trafficator (Post # 123)

The Alfatross' unrestored trafficator box before cleaning.
Inside the box: two solenoid relays and an 
adjustable flash interval timer whachamacallit.
  The "marshmallow" on the right is the 
modern equivalent. 
In 1955 the electronic device used to make turn signal lights flash was sometimes called a trafficator. The Alfatross' is an aluminum box on a bakelite platform about the size of a generous slice of ravioli lasagna. I would say it is an electronic dinosaur except dinosaurs lasted 65 million years and these things only lasted maybe five. The devices that perform the same function today using the same principles are about the size and shape of a marshmallow and last forever. 

I talked about The Alfatross' trafficator a year or two ago in the context of how I was going to try to get it working again. We lost points in the 2016 Arizona Concours d'Elegance because we still had not solved that problem. This post is about the monumental--nay, heroic!--effort that went into getting the damn thing working in the two weeks leading up to the Santa Fe Concorso last August. 


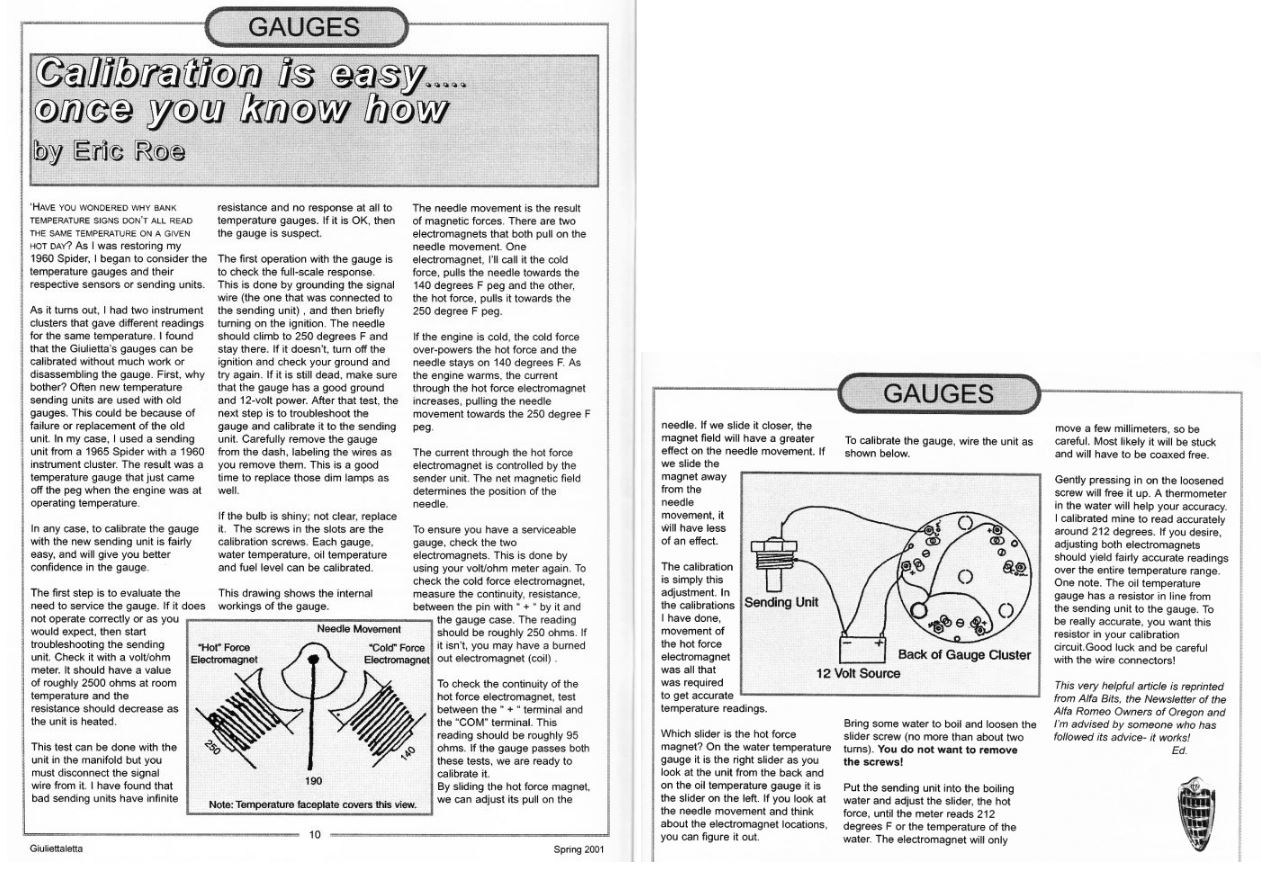
"Printed circuit", 1955 style!


The Carello trafficator box in position on the firewall

connected to all 10 wires.

Little Box of Problems

Ten wires lead into and out of the trafficator. There is a ground of course, and a wire supplying power from the battery circuit. One wire supplies power to the light on the dash that flashes to let the driver know the indicator lights are working. Two wires lead back to the turn signal switch on the steering column that activate the circuits powering the front and rear, left and right signal lights through four more wires. And one wire leads to the switch on the master brake cylinder to activate the rear brake lights. Ten wires: pretty simple, really, and the replica wiring harness connections were numbered to match, but it's easy to get confused because you're lying on your back upside down under the dash with the box mounted vertically so you can't see the embossed numbers telling you which wires go where. Try it some time if you don't think that sounds hard--and be sure to add sleep deprivation, problem-solving fatigue, a high degree of growing frustration--and mistakes in information you assumed was correct! With regard to the latter, here are a couple of examples of the kind of things that can take days to figure out:

Example One: The front signal lights' three female connections are clearly indicated with a ground, a red socket for the brighter signal light filament and a plain socket for the normal running light filament. But the driver's side unit's sockets were reversed at the factory.  Guess what happens when the brighter filament is left on for a few minutes.  It melts the plastic lens!

Example Two: The indicator light wiring harness at one point enters a three-wire connector joining two ground wires for the left and right signal lights and a third wire providing power to the circuit.  The connector in the new harness was defective, creating an intermittent open circuit for the signal lights on the right side, preventing them from performing their signal function. The lesson is don't assume reproduction parts are faultless just because they are new!


Back Story

I took the trafficator apart for the first time probably 30 years ago.  A bent contact strip on top of one of the two electromagnet relays told me it was damaged during a misguided repair attempt made some time before I got the car in 1969.  That was easy to fix. But the unit still didn't work. After surfing the Web for a few hours and finding only one reconditioned example for sale at 1,400 Euros, I became much more interested in repairing mine! As luck would have it Gregory, a neighbor who in a previous life used to make AtoCENSORED at Los Alamos dropped by The Shed looking for a challenge. Already feeling an over-abundance of challenges, I eagerly foisted it off on him.

A few days later he brought it back successfully repaired with a modern $5.00 flasher module grafted on in place of the original. I considered asking for a warranty but thought that might be pushing my luck. Before installing it I decided to wire it up outside the car using all the parking, turn signal, and brake light components hooked up to a 12V motorcycle battery.  I hooked it up, activated the turn signals for the left side and both lights came on . . . but they didn't flash! Then I realized that it takes a few beats for the flasher circuit to warm up. Note to self: flip the turn signal lever well in advance of when you want the lights to come on!


The trafficator connected to all four signal lights, brake lights, and the dash light exactly as they would be in the car.

Now confident that the system was operational I put the lights back on the car, reinstalled and reconnected the trafficator, flipped the turn signal switch . . . and only the signal lights on the left side worked!  Arggggh!  The more I fiddled with it the more erratic it became. !*#X%&!
David's reconditioned trafficator is considerably neater
and more robust than the original while retaining all the
original parts except the flasher interval timer.

Time to implement Plan B: Call David Smith. Turns out David knows a guy in New York who repairs trafficators. It takes a while, but when they come back they are fully functional and bulllet-proof. Given my time constraints David offered to give me one of his that was already repaired . . . or was it a loan? I can't remember.  David, if it was a loan I promise to send it back as soon as I get mine going again.  Really. 

When David's rebuilt trafficator arrived I marveled at how neat the conversion to the more modern heat-controlled flash interval regulator was. But the aluminum cover was unrestorable, necessitating swapping it for The Alfatross' relatively unblemished one. 

 . . . So there The Alfatross and I were one crisp September morning on the lawn at the Santa Fe Concorso with our bright, shiny, better-than-new trafficator in place, waiting to wow the judges. As they poured over the car I eagerly asked one of them if they would like a turn signal demonstration. "This is not that kind of event", he said.


Thursday, December 15, 2016

The Right Stuff (Post # 122)

Illustration of the parts of The Alfatross' original exhaust
system. The parts in the upper right corner are the heat shields
that cover the generator, starter, and steering column. Another
heat shield covers the "siamesed" muffler or resonance chamber.
The system is supported by three sets of hangers. 
One of the big surprises in this restoration is how difficult it has been to replicate the exhaust system. Why bother? After all, it's something you can't even see most of the time and not usually judged in car shows. True, but even if exhaust systems aren't readily visible or judged they are an important part of how well the engine performs and how it SOUNDS. A car's exhaust note is its voice and as such, just as much a part of its character as is a person's voice.  


I was able to make a sketch with dimensions of the original exhaust system before it returned to earth and to save what was left of the header flanges. I could not help but marvel at how sophisticated and performance-oriented the surviving parts of the system were: Individual exhaust headers mated to double pipes running the entire length of the car with a siamesed  resonance chamber, a crossover pipe, and two sets of mufflers. 
The exhaust system starts with the beautifully-made 4-into-2 headers. To get a good look at them you have to first remove the aluminum shroud that ducts cool air to the headers when the car is moving.  The next thing you notice is how the steering column passes between the header pipes!  Then you note the aluminum heat shields covering the generator and starter and the asbestos shield wrapped around the steering column. Seems like overkill or even some kind of high-performance affectation. You don't appreciate how absolutely essential they are until you fire the engine up. Those pipes quickly reach 500+ degrees F, even at idle!


Until relatively recently original exhaust systems after the headers were typically made of mild steel with little thought given to corrosion protection, so they didn't last long. They lived out of sight under the car where they got bashed by things you thought you could drive over--but couldn't. The combination of heat, water vapor, and exhaust gasses guaranteed a nasty, brutish, and short life. 

As mentioned earlier in this never-ending blog, part of the Alfatross' exhaust system had already fallen off by the time I bought the car in 1969. I noticed it was unpleasantly LOUD and when I looked underneath, the entire system aft of the second set of mufflers was gone except for the hanger straps dangling forlornly in the breezeWhat was left of the exhaust system followed suit during the 47 years The Alfatross patiently waited for its restoration. In 1995 I ordered a custom-made all-stainless exhaust system through Joost and Peter and that is the one now on the car. It looks and works well, but I'm sure it is louder that the original system, perhaps because it lacks the third stage muffler pair aft of the rear axle.
Jeff Robison and I installing the current exhaust system. It works well and is well-made of quality materials, but differs from the original system.
But I wanted something more authentic. Images of the original system, which was quite complex, may be found in period catalogs and I noticed that at least one of The Alfatross' restored siblings, *02056*, has a pretty good replica system. But where did it come from?


An illustration of the exhaust system for Alfa 1900 SS and TI models from a period catalog.
The long-awaited AFRA exhaust system finally arrives more than 9
months after being ordered and paid for.

Naturally, production of exhaust systems for Alfa 1900s ceased decades ago. One of the biggest suppliers of parts for old Alfas in Italy is AFRA, s.a.s. When I noticed that they offer a replica system I ordered one. That was nine months ago. After pestering them for 6 of those 9 months the gestation period finally bore fruit and the system arrived at my front door. Having been warned in advance by Giuseppe Maranghi and David Smith that I should not expect to be impressed, I was not crushingly disappointed when I unwrapped the package.  
Example of sloppy welding and damaged 
muffler neck on the AFRA system.
This is AFRA's idea of how to fabricate an exhaust system.
Each pipe is made up of at least six sections of tubing of
different diameters sloppily welded together--
looks like it has already been crashed! 

Even before trying to match it to The Alfatross I could see that the long wait was a waste of time. The system already on the car was far superior to what now lay before me: low-quality materials, pathetically poor welds, absence of a critical attachment point, flimsy gaskets, and crude bends. Four short sections of pipe were stainless but everything else was cheap mild steel. The system appears to have been fabricated in two different shops. The front half, painted black, is all mild steel. The critical bends between the header flanges and where the pipes straighten out were not created on a mandrel but made up by crudely welding many short sections together. The fabricators did not even attempt to recreate the "siamesed" first stage muffler or resonance chamber. The silver-coated back half consists of two pairs of off-the-shelf steel mufflers joined by stainless pipes. I might actually be able to use parts of the second section, but the first section is worthless! 

So I still don't have the right stuff--but I'm getting closer! I just learned from David Smith that Quicksilver Exhausts (http://www.quicksilverexhausts.com/1900-Ti-and-Super-Sprint---TWIN-Stainless-Steel-Exhaust-(1953-59)_ALFA%20ROMEO_915_productbulletin.htm) makes reproduction systems for the Alfa 1900 SS model and they look pretty good.  It comes in modules, making it easier to install and adjust the fit, is all stainless, costs just over $1,000, and arrives only 2 weeks after the order is placed! David already ordered a set for his car, *01947*.  If he is pleased with the quality of the system I may follow suit.  After all--"Third time's the charm"!


Monday, November 28, 2016

Surveillance Functions Part Two (Post # 121)

Condition of the instruments in 1970.

Joey Lobo, owner of Mo-Ma Manufacturing.  This guy
really knows his business!  

Continued from Part One

After the Veglia tach cable broke I took it down to Albuquerque to Mo-Ma Manufacturing (http://www.momamanufacturing.com/) to see if the cable could be repaired or replaced. Joey Lobo, the owner, swiftly repaired it while I waited and as he handed it back asked "Why do think it broke? You know these cables are pretty tough!" I just assumed it wore out, but he suggested that I try turning the shaft on the back of the tach that the cable attaches to. If it won't turn, maybe the gauge locked up, causing the cable to part. Sure enough, that turned out to be the problem, necessitating another visit to Mo-Ma to have the tach's internals repaired. 


The unrestored speedometer and tach: rusty chrome, cloudy faces, peeling painted surfaces!

The speedometer after restoration by North Hollywood
Speedometer in 2002. The restorer took liberties with The

Alfatross' instruments--inside and out-- that cost a lot of 
time and money to correct.  Thankfully, guys like Joey 
Lobo know how to make it right!
The speedometer/odometer after re-restoration at Mo-Ma 
Manufacturing. Note the 5 white dots inside the number 
ring.


Joey fixed the tach in short order and when I went to pick it up he asked who restored The Alfatross' gauges back in 2002. It was North Hollywood Speedometer--I still have the invoice. Then he asked if authenticity--correctness--was important to me, because he could not help but notice that the tach's dial face did not look as it would have originally. Using an unrestored set of gauges from another 1900C SSZ at this shop, David Smith's car, he showed me how the original speedometer and tach gauge faces were made up in layers: a one-piece concave bakelite plate painted "Light Driftwood" (a brownish gold) with a step in the center to create a 3D effect. 

For the speedometer, the center is labeled "Km/h". while the black outer ring has "Veglia Alfa Romeo" printed directly to piece. This layer is overlaid by a clear plastic concave lens with the 0-220 white numbers and lines printed on its back side (I still remember seeing the speedometer for the first time 47 years ago, assuming it was in MPH, and thinking "Man, this thing is fast!"). The last layer is the glass lens that covers everything.
Joey pointed out a neat detail on the original speedometer face: five white dots on the gold center circle opposite 60, 90, 120, 160 and 180 KPH. Did they actually mean something or were they just decoration? Joey let me ponder that for a few moments then pointed out that the dots corresponded closely to five velocities in MPH: 35, 55, 75, 100 and 120!

So now The Alfatross' gauges are back and properly restored.  This experience has taught me several important lessons: (1) Don't just assume that someone offering a service like instrument restoration knows what they're doing when it comes to your particular devices. It is well worth spending whatever time and money are required to vet potential choices before consigning your original parts to a vendor. (2) Make a thorough record of the original condition of the parts you consign to a restorer before you send them off--and thoroughly check them for appearance and  function when they come back!


Some examples of the instruments Joey Lobo at Mo-Ma Manufacturing has restored. Many Pebble Beach winners sport instruments restored by Mo-Ma.  All it takes is knowledge of what they looked like originally . . . and a warehouse full of unobtainable parts.  Oh yeah, and then there's the  30+ years of experience.  And the eye of an eagle. And the patience of a saint. And the hand of a neurosurgeon.  And . . . .


Gratuitous beauty shot of the properly restored tachometer.  Joey was not happy with the
quality of the chrome on the surrounding bezels. If he were doing the whole job he would have sent them to the chrome shop he always uses.  Problem is, that would have delayed the restoration by another month, so I decided that was a level of perfection we could sacrifice in order to get The Alfatross back on the road sooner!


Tuesday, November 22, 2016

Surveillance Functions Part One (Post # 120)

The 6 Veglia gauges as they looked in 1969 when I bought
The Alfatross.
"Surveillance", along with battery charging, signalling, engine starting, service, and lighting, is one of the 6 basic functions of The Alfatross' electrical system. It is a very simple system comprising the gauges and their sending units as well as a few warning lights. Far from being mere decorations, they keep watch over the condition of the engine, battery, and fuel supply. 

If The Alfatross were going to be just a trailer queen shuttling between Concours d'Elegance it wouldn't matter if the gauges didn't actually provide any useful information. All they would have to do is look good. But that was never part of the restoration plan. Every part of The Alfatross has to work.

When I sent The Alfatross' 6 Veglia gauges to North Hollywood Speedometer for restoration in 2003 I really had no idea what to expect. They had them a while, charged me $1,356.28, and sent them back. I thought they looked great and was pleased! They didn't actually get installed and tested until winter 2015, at which point I discovered to my surprise that the oil and water temperature gauges didn't work. Then the mechanical tach cable broke. 

This made me realize there is a lot more to "restoring" gauges than just making the bezels and faces look good. I began to get suspicious. How can gauge restorers make sure the gauges work with the senders in your engine unless you send them the senders, too? No one ever mentioned that although it should have been apparent to me from the beginning. 

The water temperature gauge on Dan
Allen's workbench.  The sender is
immersed in a pan of water heated to 170
degrees.  The gauge is calibrated in Celsius.
Dan Allen.
The large tachometer and speedometer are centrally located above the wheel and surrounded by the smaller oil pressure, oil temperature, water temperature, and fuel level gauges. The mechanical oil pressure gauge worked fine, as did the fuel gauge after fiddling with the sender, but the two temperature gauges were completely dead--no needle movement at all. Apparently, to the guys at North Hollywood the word  "restoration" does not include making sure it works. So what was wrong?  Was it the gauges themselves or the senders or the wiring that connects them?  How do you trouble shoot them?  I knew needle movement on the gauge is based on changing resistance in the circuit between the sender and the gauge and that it can be adjusted, but even if the needle moves, how do you know the reading is accurate?  

I went on line to find out more about gauge problems and how to cure them. Not surprisingly there is a ton of information available on the subject in general, but not so much relating directly to Veglia gauges manufactured in 1954. The article below was helpful, but describes the calibration procedure for instruments having electromagnets that can be adjusted without opening their cases. To access the adjustment screws in The Alfatross' temperature gauges you have to open their cases--something I didn't want to do.  
This article in particular was helpful and deals specifically with gauges on a 1960 Giulietta.
Giuliettaletta Spring 2001.
The next challenge?
After flailing around for several days I contacted Dan Allen to get his advice and ended up sending him the water temperature gauge for an autopsy. Turns out the gauge could be repaired and, once mated to a compatible sender he had in his stash, could be adjusted to read accurately all the way to boiling. I re-installed the water temperature  just in time for the Santa Fe Concorso and it worked perfectly, but the oil temperature gauge was still moribund--and I was about to discover a much bigger problem affecting ALL The Alfatross' instruments, one that would that would teach me the difference between a generalist instrument restorer and a truly expert one--and set me back another month! To be continued in "Surveillance Functions Part Two" . . . . 

Thursday, October 20, 2016

"Creative Space" (Post # 119)


The Shed

A quarter inch to the foot scale model of The Shed I built
to better visualize the design in three dimensions.
I've seen a lot of articles in car magazines showcasing enthusiast's garages. Some of them are spotless and not garages for work at all. More like museum exhibits with expensive artwork on the walls, patterned spotless floors, and cars posed dramatically under studio lights as if on display at the Louvre. My garage is for work, not display. My wife started calling it The Shed after seeing the movie "The World's Fastest Indian" (https://www.amazon.com/Worlds-Fastest-Indian-Anthony-Hopkins/dp/B000F8DBDK). 
The wet work area with storage underneath the sink, lab
oven on the left and mini refrigerator and coffee machine
on the right.

The main thing it has going for it is that it was purpose-built for working on cars, The Alfatross in particular. I started with a budget and a patch of land. I knew I needed a big open room with a 12 ft ceiling, lots of storage space, and a second smaller room for "clean" work. I contracted with a designer and went around and around with him for months. He wanted it to be an architectural statement. I just wanted it to be functional and finally drew up my own plans, made a model to make sure it would work, and started building. It isn't perfect, but after working in it for several years now I realize I got at lot of things right. It isn't a showplace. What I want to talk about now is the space itself and what I have learned about what makes a good work environment.

Keep it clean.  Automotive restoration is by nature dusty, greasy, oily and smokey, but you and your work will suffer if you don't keep it clean! The Shed's epoxy floor probably gets the most comments from visitors. But it is practical, too.  It costs a lot to do it right, but it's worth the extra effort. A lot of shops featured in magazines don't seem to have a water source or a big, deep sink. I have a 6 ft long indestructible plastic combination deep sink, drain rack, wet storage and draining tub and stainless steel stand that I picked up years ago from a photography shop put out of business by digital imaging. I added a proper restaurant kitchen dish-washing spray head on a long flex hose. The shed is on well water, which is really hard (lots of dissolved minerals), so an item on my list of improvements is a water softener. I use distilled bottled water for tasks where purity matters.

Get comfortable. It's hard to do good work when you're uncomfortable. Maintaining a comfortable temperature, humidity, and air circulation combination is probably the most important task. Here in Santa Fe humidity is very low so even when the air temperature is in the 90s it isn't uncomfortable. It's the winters we have to worry about! I use a pair of radiant tube heaters that, in conjunction with a large bank of windows on the building's south side and some very good insulation, keep the interior so cozy I am comfortable in shirt sleeves even in the dead of winter. 

I generally prefer to stand while working, so most of my tables and benches are tall, but I also have low tables where I can sit to work when necessary. It's hard to concentrate when you are hungry, thirsty or sleepy, so I have a microwave oven, toaster oven, coffee machine, and a mini-refrigerator stocked with drinks and leftovers.


The bank of windows on the south side of The Shed is 16 ft
wide and 6 ft high. The steel shelving under the windows
gives me extra storage space and the wooden counter top
provides well-lit work space at a comfortable stand-up
height.


Let in the light. If you are past the half-century mark like me, you really notice the quality and quantity of light in your work space. If you can't see it, you can't fix it. Natural light is great. The 16 ft long, 6 ft tall  bank of windows on the south side lets in lots of light and heat in winter. The bottoms can be opened for cross-ventilation. I learned pretty fast that I needed insulated blinds that can be lowered to block out unwanted heat in the summer and reduce heat loss in winter. The windows needed to be on the south side to take advantage of the powerful insolation effect in winter here in New Mexico at 7,000 ft. But that put the overhead door and the 20 by 20 ft apron on the north side--meaning a lot of snow shoveling in winter! 


In addition to the windows, florescent lights and large skylights keep the work space bright. The long black tube mounted near the ceiling is one of two radiant heaters mounted on opposite sides of the room with their reflectors turned 45 degrees from parallel with the floor.
The two largest work tables are on casters. The one in the
foreground used to be the trolley for The Alfatross' body
and chassis after the suspension and running gear were
removed. 
The high ceiling let me put the bottoms of the windows at about 4 ft where the wood-topped steel shelving below them makes a well-lit 16 ft-long, 18 in-deep work bench. 


The Shed has three 4 ft by 4 ft skylights in the main work area and another one in the clean room. In addition to the windows and skylights I have 10 multi-tube florescent fixtures suspended from the ceiling at various heights. Some are higher to bathe large areas whereas others are lower to intensify light over work tables. At this point I haven't paid much attention to color temperature or fixture quality, but just making sure there is sufficient volume of light. 

I spend a lot of time at this table, built on top of a cheap
motorcycle lift. It can be adjusted to heights ranging from
21 to 38 in. The table and pedestal can be removed when 

the lift is needed


Keep your space reconfigurable.  I learned from experience in archaeological conservation labs that you should put as many things as you can on wheels to make it easier to reconfigure the space to match the nature of the work to be done. That's one reason why I went with a MaxJax two-post lift. If it is in the way I just unbolt the posts and move it. Yes, the MaxJax lifts only to 4 ft, but I don't see that as a problem. All you need is a chair on casters, lights, and a tool carrier on wheels and you can do everything as well as you could if the car were raised to 7 ft and you were standing underneath. Wheel jacks are another way to move cars around in confined spaces. 
This tool caddie was made from a wheel dolly and scrap.
It is low enough to fit under a MaxJax lift and carries a
full complement of sockets, screwdrivers, spanners,
pliers, and other tools.


Outdoor work space. I always like working outdoors, weather permitting, and there are a lot of jobs that you really can't do indoors, like soda-blasting an entire car! The concrete apron outside the overhead door became much more useful and comfortable after I covered it with a 16 by 16 ft canopy. Sunlight kills paint, upholstery, rubber, vinyl and just about everything else including your skin. Up here in the mountains where there isn't much atmosphere to protect us, dermatology is a growth industry! 


But the most important thing to remember about  space is that there is never enough of it! That's why The Shed is in the process of having a "blessed event": The Shedlet!

Thursday, October 13, 2016

Distractions (Post # 118)

Hummer alert! Get out the feeder and charge it up!

You have to start by positioning the feeder in the
hummer's flight path well inside the building 
and close 
to the ceiling. Eventually they find it and land for a 
drink.

Every summer the hummingbirds migrate through the mountains of New Mexico on their way to Central America, as they have done for millennia. Like most people, I admire their amazing navigational and aerobatic abilities . . . and ask myself if they are so smart and capable, why do they want to fly into my garage, and why can't they find their way out through the same gigantic overhead door that they flew in through? My overhead door is open a lot during the months when the hummers are here, so I get a lot of unwanted visitors.

They tend to fly around close to the ceiling 12 ft off the floor, making them virtually uncatchable. I spent many frustrating hours chasing them around with a butterfly net, trying to catch and release them safely outside. Then one day I noticed that they all tend to roost on a red electrical cord reel attached to the ceiling. I knew that they are supposed to be attracted to certain colors and that is why hummingbird feeders are usually red, so I nicked a red feeder from my wife's collection along with the formula for making fake "nectar". 


Then you have to start moving it toward the overhead
door in stages until you can hang it on the door itself.
They will go directly to it, drink, and fly out!


The next time a hummer flew in, instead of chasing it around I filled the feeder and 
confidently hung it in the middle of the overhead door opening. Didn't work. The hummer circled the ceiling for an hour, oblivious to the feeder in the middle of the biggest opening in the building . . . until I moved the feeder inside and near the ceiling. Within minutes the hummer found it and lit. This was all it took to make the connection in the hummer's tiny brain so when I moved the feeder to the overhead door he followed, lit again, drank, and flew out! I've used this trick dozens of time since then and it always works. 


Monday, September 26, 2016

The Alfatross Has an Excellent Adventure (Post # 117)

There I was . . . alone and abandoned on a windswept hillside with night coming on fast.  Where did my staff go? They drove me here and then walked off without a word of explanation or any indication of when (or if!) they were coming back. It was getting cold and the wind was picking up. Would it rain? What will become of me if there is a hail storm tonight? Something was dreadfully wrong. I could sense it in the anxiety and excitement in all the strange cars around me. Before darkness fell I counted at least 50 them, also abandoned, but some at least had been bedded down with soft fleecy blankets and even rain protection. 

But there I was--with nothing! Forlorn and longing for my nice, warm, dry Shed I slept fitfully.


That clear sky means it's going to be close to freezing tonight!  Richard Coberly.

Not long after dawn people started coming back in ones and twos, along with more cars. Eventually even my staff arrived (the lazy bums) and started wiping off the morning dew still glistening on my skin.

From their conversations I gathered that the cars around me were all members of my family, and that we were assembled here to somehow be compared to each other.  What a ridiculous idea! 

An elderly but aristocratic long, swoopy open car pulled up in line on my left. I had difficulty believing he was a relative and could not help but notice that his steering wheel was on the wrong side. I wanted to let him know, but he did not speak English! He acted like he knew what was going to happen next, like he had been here before, and impatient to get on with it--or maybe he was just bored? 


The men in funny hats came and looked the Old Man over for a long time.  Richard Coberly.
Not long after, authoritative men in odd hats appeared and began to swarm all over him. He tried to ignore them, but I could tell he was indignant.  Then they descended on me. What did they want? What were they looking for? What was I supposed to do? Minutes later they were gone. As I watched they pounced on car after car up the line.
Then they came and poked and prodded me!  Richard Coberly.

Things were more relaxed after that. The sun came out and the day was beautiful. More people appeared, staring, pointing, pontificating, snapping pictures, and talking, talking, talking. I dozed off . . . .

What?  Me? on TV? When?  Richard Coberly.
When I woke up again there was a new drama. Suddenly I was being videoed. There was a man with a really strange mustache and another man with a really big camera interviewing one of my staff who was trying to explain what he knew about me. He did OK, I guess, but how do you crowd our nearly half a century together into 5 minutes?


What does white mean? Second Place was taken by the sexy little minx to my right. She may be more voluptuous--but I have more insurance! Richard Coberly 
Then I noticed that someone had come up and put a white ribbon on my wiper while I was sleeping. People said it meant something, that the Old Man on my left was the best among all the cars in the line, that the little minx on my right was the second best, and that I was the third best. 

But they failed to mention why.

After we got home, my staff said I "did well".  That the Old Man was Alfa nobility and the little red minx was a "one-of-one" prototype, a progenitor of a successful branch of the family. So that isn't the kind of competition you can beat if all you have is a pretty face.  

I don't care.  I'm just glad to be back home safe and sound. Adventure is not all it's cranked up to be.


Saturday, September 24, 2016

Santa Fe Concorso Friday Night Gathering (Post # 116)

The Alfatross made it to the Santa Fe Concorso's Friday Night Gathering without incident after all. Once again, just as at the Arizona Concours d'Elegance, she effortlessly did everything we asked of her. None of the  fears voiced in the previous post materialized.

The Alfatross was placed inside the hanger under the wings of a 1950s classic Cessna 180.  They quickly became good friends basking in all the attention.  Richard Coberly.


The Alfatross looks out upon her enthusiastic public reception. Richard Coberly.


Opening the hood to reveal the engine really drew in the crowd. Richard Coberly.
Proud parents.  Richard Coberly.

As I write this she is on the Concorso show field, waiting for the morrow when we return to prepare her for viewing and judging. It's going to be cold and possibly wet tonight. If cars have feelings she's probably miserable and lonely, even with all those unfamiliar cars around her. I offered to sit up with her all night.

But they wouldn't let me.