The Alfatross

The Alfatross
The Alfatross in 1965 and 50 years later in 2016

Tuesday, January 27, 2015

Trading Hands, Seeing Clearly, Internetting, and Hobb Knobbing (Post # 75)

Another 1900C SSZ Trades Hands

The day after I posted my "Year of Spending Extravagantly" musing the latest Sports Car Market Price Guide appeared in my mailbox.  Turning quickly to the Alfa Romeo section I was amazed to see that one of The Alfatross' brethren somewhere in the world has a new owner, and the old owner has $1,400,000! Which car it was and the circumstances surrounding the sale were not revealed, so we'll just have to wait and see.

Note the warning that "provenance is critical".  Not all 1900C SSZs are "really real".
Sports Car Market.

Seeing Clearly

Wipers.  We take them for granted. You hardly know they're there anymore. A modern car has "adaptive" wipers, meaning that the car senses when there is water on the windshield and starts to wipe, almost like blinking its eyes. The driver doesn't have to do anything. and of course you've also got an adjustable "interval" setting as well as low and high speed settings. The Alfatross' wipers are irrefutable evidence that civilization is progressing after all. They've always seemed to me to be an afterthought. In the first place they're only about a foot long.  

The motor, linkage, and drive shafts all look pretty feeble. And there's only one speed, so all you need is a simple on-off toggle switch. But the switch has four poles and the motor has three connections.  We had to fool around with it for a few hours to figure out how it worked.  The four poles and extra connection are necessary to "park" the blades when you turn it off.  Otherwise they could end up anywhere on the windshield. Very annoying.

Don't ask me how it works, but it does!


Then we noticed that some Alfa 1900s have "parallel" wiper blade action while others have "opposed" action.  An admittedly hasty survey of the known 1900C SSZ examples revealed that 10 have parallel wipers, 11 have opposed wipers, and 7 either didn't have wipers or the images don't show their position clearly.  Curious.

Wipers opposed.

Wipers parallel.  


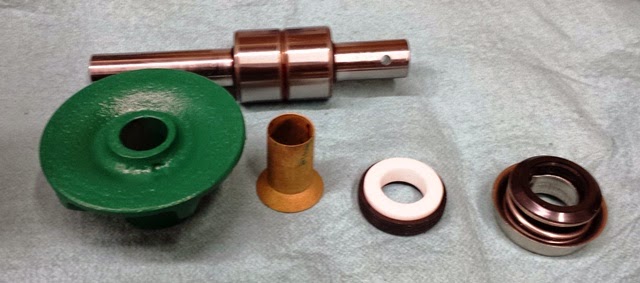
The windshield wiper motor shows signs of wear and repair.  The motor purrs smoothly and parks the blades precisely, but the linkage appears to have been modified rather roughly to
fit the Zagato body.  Jeff made new bushings to take up the slack but final adjustments will
have to wait until we mate it to the body.


Miracle of the Internet

There are some parts that are so model-specific, so short-lived, and so rare that you never bother trying to find "new old stock" or even reproductions of them. One such item for The Alfatross is the rubber-coated steel plate that serves as the weather-seal for the hole in the floorboard beneath the clutch and brake pedals.  

The Alfatross' original badly-deteriorated pedal plate
(above) and the reproduction or NOS part offered by OKP.
The Alfatross' original unit had the rubber equivalent of leprosy and although the more substantial parts of it were recognizable, the critical parts where the rubber made the seal around the pedal "legs" were missing.  In desperation, I began trying to rehabilitate the original plate, but without knowing what was missing my efforts were futile. Then, quite unexpectedly, while in the process of looking for something else on the OKP Web site (https://www.okp.de/t3/index.php?id=30&L=1) I found it! The heavens opened up, a ray of sunlight struck my computer monitor and Handel's Hallelujah Chorus began to play.

I don't know if it is New Old Stock or a reproduction, but it is a perfect match to the original.


Hobb Knobbing

The Alfatross' dash is busier than most: 6 gauges, ignition switch, heater fan rheostat, light switch, manual throttle, and windshield washer pump on the dash proper and 6 toggle switches, ventilation control, and dynometer underneath.

The original knobs are on the left, the best reproductions are in the middle, and reproductions for Giuliettas are on the right.


Three of the control knobs have insignia on them, but the one for the lights switch split decades ago allowing its insignia to fall out and get lost. I was perfectly happy to use the two intact original knobs for the throttle and fan even though they were hazy and indistinct, but the cracked and incomplete light switch knob was a real eyesore.  In the process of looking for a replacement I discovered that there are at least two different reproduction knob sets available. One set is substantially the same, but with gold insignia over black backgrounds. I bought it thinking that it was as close as I was going to get. Subsequently I discovered that there is another. more authentic set which not only has the insignia set in a gold background, but also has the correct knob length.  

So now I have two dilemmas: Should I just replace the knob for the lights switch, and keep the functional but funky originals? And what do I do with the superfluous gold-on-black set?

Wednesday, January 21, 2015

Heart Surgery (Post # 74)


It looks like the Alfatross' engine is finally getting close to completion. At this point virtually every part has been cleaned, inspected, refinished, polished, checked, and double-checked. The pistons, rods, valves, valve guides and springs, bearings, timing chains, and cam sprockets were replaced. Reassembly is under way. I'll let DeWayne Samuels describe what was done most recently and why:

Head gasket pattern in place over the head.  
Roger Lorton.

Glyptol coating the block interior
Roger Lorton

"After disassembly, the block was stripped and baked to remove all oils and residues It was then shot abraded to clean and remove casting flashing, etc. After all the machine work the block was jet vatted then cleaned with Prepsol and virgin lacquer thinner to prepare all surfaces for coatings. The oil contact surfaces were coated with "Glyptol" (as was the original finish) - this seals the cast iron, preventing minute iron particles from breaking free and entering the oil system and creating a "slick" surface to promote oil return to the sump.


The photo above (right) is of the trial assembly to check deck height of assembled crank, piston and rod for determination of head gasket thickness to maintain desired compression ratio and verify all clearances."


The new custom head gasket.  Roger Lorton.
"Here is the sheet metal head gasket pattern I made to have a composite gasket made up. Then it was used to finish the torque plate dimensions as shown. Next the torque plate was installed on the block to imitate the cylinder head load on the deck and cylinders. The block was then bored, honed, and plateau honed to facilitate ring mating and reduce "crowns" in the hone cut that can tear into the ring face microscopically."

Machining the torque plate.  Roger Lorton.

Boring the cylinders with the torque plate in place.
Roger Lorton.


New valve guide (right) compared to the old
one.  Roger Lorton.
"This is a pic of the redesigned valve guide that Roger and I came up with. It incorporates a valve seal (the originals had no seals). The install height limit seat (on the guide) is at a new position that corresponds with the change in the valve spring seat necessary to utilize the valve springs we sourced in lieu of any custom made units and the "available but not desired" units that also cost a lot more. 

Additionally, each guide is independently machined for the desired fit into the cylinder head as each bore was found to vary in diameter. The guides are honed to size internally after installation to insure proper oil guide wall to valve clearances as the interference fit distorts the dimension causing a slightly smaller i.d. than prior to installation."

If this level of engine work seems excessive, remember that the engine appears to have been "rode hard and put away wet" during the first 14 years of its life before it ended up in my garage.  DeWayne and Roger found abundant evidence of "deferred maintenance" and even improperly performed repairs. 

Replacing the engine oil with STP, hosing it off and repainting it was not an option.  It had badly worn cams, burnt valves, a broken valve spring, and worn main bearings that needed replacing, so as long as it was apart we decided to address ALL of its issues at the same time. After all, it is the whole, original, numbers-matching engine. Engine-building has come a long way over the last 60 years. Why not incorporate some of that experience in the rebuild?   


Friday, January 2, 2015

Adios 2014: The Year of Spending Extravagantly (Post # 73)


In the movie Raiders of the Lost Ark renegade French archaeologist Rene Belloq tells Indiana Jones  

Look at this [a pocket watch]. It's worthless. Ten dollars from a vendor in the street. But I take it, I bury it in the sand for a thousand years, it becomes priceless! Like the Ark.

Metamorphosis

Fifty-nine years ago some guys in Italy built 39 examples of a limited-production race car.  One of those examples in its fateful trajectory crossed my path and we bonded.  It wasn't an easy road to travel.  I was 21 years old and The Alfatross was only 14.  Too young to marry, but I like to think that the relationship was beneficial to us both . . . most of the time.  Like all relationships, it was always a work in progress.  It was on my "bucket list" for decades, but 2 years ago it rose to the top. I hope 2015 will be the year I can finally strike it off the list.
The Alfatross for sale in 1965.  Asking price: $2,250. Pat Braden.
So now we are entering the third year of its restoration. I have no way of even estimating the amount of time I have spent working on it, but what does it matter? Every second spent was fun and I always looked forward to the next time I could get to work on it and always regretted having to quit. In the beginning it was an exciting project that could piddle along in the rhythm of my life, providing an excuse to hide in the "flow state" for a while. 

But nothing stays the same. It is important to stop and reassess from time to time, particularly if the process is taking decades to resolve itself. Eventually, it became apparent to me that my original plans for The Alfatross had to be scrapped. Somehow, over the decades, while wrapped in its car cover cocoon in a dark corner of my garage, it metamorphosed from a kinky old foreign car into something else. I was no longer just the person who owned it but the Steward of an Historically Important Automobile. Along with that revelation came the realizations that (a) its restoration had to be done in a very particular way and (b) it had become very valuable. 

But how valuable?  Two years ago I started this blog with the statement (in the header above) that these cars are worth "half a million and up."  Since then the bar has been raised.  Considerably.  


Value vs. Cost

The steward of an historically important automobile should not correlate the costs of restoring and maintaining such a vehicle with its value. Valuations are ephemeral, changing over time, growing and shrinking like all other assets. Prized mechanical possessions wear out or are rendered obsolete by improved technology. They lose value. Desirability fades. Then the survivors become rare. Scarcity enhances value. Nostalgia kicks in. Perceived value goes up . . . and so does the cost of restoration!

In 2014 I spent extravagantly on restoration costs, in spite of the fact that a lot of  work was done in previous years.  I do not regret a penny of it, but like a mistress (or so I am told), The Alfatross absorbs all of my unencumbered time and money!

Still, it is important to know what value the market places on an historically important automobile and the trajectory that value has taken over a long period of time.  My research has turned up very little information in that regard, as most sales over the last decade or two have been private.
One of The Alfatross' brethren (chassis no. unknown) sold
at auction in 2001 for $217,000.  Sports Car Market.


Chassis no. 02056 sold at auction for $557,000  in 2009.
Tim Marinos.

The Record


The price of a new 1900C SSZ in 1955 was $6,637. From that point their value decreased steadily with time as it does for most cars. By 1963 The Alfatross was on its 5th owner, Pat Braden. I don't know what he paid for it 8 or 9 years later, but in 1965 or '66 he sold it for $2,250. Its value continued to decline precipitously, allowing me to buy it in 1969 for $770 . . . It would never be worth less.

There follows a twenty year period for which I have no valuation information.  In 1992 I was considering selling The Alfatross. I had soft offers of up to $80,000 from four different bidders including Keith Martin and Martin Swig, but in the end decided to keep the car.


Chassis 10593 "Zagato's Zagato".  Private sale in 2013 for
 $1,200,000?  Matteo Bossisio.


Nine years later I was surprised to see an article in Sports Car Market about the sale of a 1900C SSZ at the 2001 Bonhams and Brooks auction at the Cavallino Classic in West Palm Beach auction.  It was apparent that the author was very familiar with the model--their engines, handling characteristics, interior space, and even noise levels inside the cabin. The author was none other than Pat Braden!   

Chassis no. 01947 (unrestored) sold at auction in 2014  for 
$1,012,000.  Sports Car Market.
The serial number of the car was not mentioned, but its condition was described as "pristine" and it brought a surprising $217,000.  This was doubly surprising because the SCM Price Guide valued the car at only $85,000-$120,000. 

Perceptively, Braden concluded his analysis with ". . . this car sold for a remarkably high price, appropriate for its remarkable condition. The new owner faces a classic question: whether to use the car as it was meant to be used, thereby risking injury to it, or to retain it as a showpiece and conserve a considerable investment. It will be very interesting to note the price of the next 1900 SS Zagato to cross the block and see if this price was an aberration, or a harbinger of value increases to come."

The answer to that question came in 2009 when chassis no. 02056, another beautifully restored example now part of the Arturo Keller collection, sold at auction for more than twice as much: $557,000. 

Sports Car Market's Price Guide recorded another sudden jump in value in 2013 with a new figure of $1,200,000 for an excellent example.  Although we don't know anything about the sale that produced this figure I suspect that it was "Zagato's Zagato", chassis no. 10593.  In any case it is a new high-water mark for 1900C SSZ values.  

An even more surprising result occurred this year when chassis no. 01947 sold at auction for $1,012,000.  I say surprising because this was a non-running car without matching numbers in need of everything. 

What does the future hold for The Alfatross? Will its value continue to increase or has it reached its zenith? Who will become its next Steward? Will that person set it free to once again roam the open road? Or, like so many of its brethren, be "confined to quarters" like the Ark of the Covenant in the last scene of Raiders

Marcus Brody: Where is the Ark?  Major Eaton: I thought we'd settled that. The Ark is somewhere very safe . . . .

Thursday, December 18, 2014

Separation Anxiety (Post # 72)

It's hard to believe that the restoration of The Alfatross began almost two years ago.  Knowing what I know now, it's even harder to believe that I ever thought it could be done in just one year!  With 2015 fast approaching it's time for updates from the guys who are working on The Alfatross' sub-assemblies. Here are their latest reports: 


The Chassis and Body (Tim Marinos at Vintage Autocraft)

The Alfatross at Vintage Autocraft.  Tim Marinos
"Zagato built beautiful car bodies but was not well known for exceptional fit and finish.  I heard a restorer tell his customer, 'The great thing is it’s a Zagato' and in the same breath, 'The difficult thing is that it’s a Zagato.' 
"The good news is, it's a Zagato.  The bad news is . . . . " 

The hood skin minus its steel framework.  Tim Marinos.


With the vast majority of the underbody repairs to The Alfatross complete, we now focus on fitting the body components. One of the more tedious aspects of the restoration process is repairing past “sins” or issues such as poor build quality, poor repair methods, and existing damage and decay. This requires repairing and fitting up virtually every part pertaining to the body: all open and shut panels, window mechanisms, latches, trim, bright work etc. Rubber seals must be sourced, fitted and modified or made if an original style is not available. 

The hood skin with frame reattached.  Tim Marinos.


Every screw hole must be checked, re-welded if needed and sized for the correct hardware. During final assembly is not the time to deal with stripped out 2.9 mm trim screw holes! The extra effort spent at this stage returns in spades down the home stretch in terms of time and stress.

We must always be aware of the need to maintain a balance between fixing poor build quality issues and over-restoring. I always go back to the intent of the builder and take it to the highest level which is evident that they could achieve over all. This is the course we are following with The Alfatross."


The Engine (DeWayne Samuels, Samuels Speed Technologies)


The water pump housing.  DeWayne Samuels.
The shaft, bearing, impeller, seal and spring after
restoration.  DeWayne Samuels.
"Supplied water pump assembly was disassembled and initially cleaned and inspected. The housing had very bad corrosion creating porosity and pitting requiring chemical and glass bead abrasion to clean the metal enabling the surface to be ground to clean metal and prepared for welding. 


Various areas, especially at the radiator coolant supply hose bib, required multiple weld passes with shaping and re-welding to restructure the unit's integrity and restore the housing's original shape. 
Corrosion on the hose bib required building up and
grinding back into shape.  DeWayne Samuels.
Water pump restored and ready for installation.
DeWayne Samuels.
Once the porosity and corrosion problems were corrected; the entire internal surface in contact with coolant was coated with a protective sealant. The mating surface in contact with the engine block was machined flat as it too had porosity and corrosion problems. The new bearing assembly was modified to accept the fan pulley and machined to the proper length for the Zagato setup. 


The new bearing assembly was then pressed into the housing along with anew carbon dynamic seal assembly.  The coolant impeller was pressed into place with attention given to proper seal spring compression height and impeller clearance with the housing vortex seat. The unit is now ready to accept the fan pulley and awaits installation."


The Interior (Derrick Dunbar, Paul Russell and Company)


Body color overspray on the vinyl trim of the back seat
panel.  Derrick Dunbar.
"I am sending you three photographs of the material that came off the back panel of your rear backrest.  If you look closely you will it has some overspray residue on the vinyl edges where it wraps around the back panel.  This is evidence that the body was sprayed while in the car at the factory. Because the restoration calls for replacement of this piece of vinyl, we can either duplicate the overspray to preserve the way it was done at the factory, or leave it clean. Let me know what you want us to do".    
The back seat backrest panel.  Derrick Dunbar


One of the black vinyl quilting panels that cover the fire-
wall.  Derrick Dunbar.


The front seat backs and frames being reupholstered.
Derrick Dunbar.


The black quilting is your original that has been cleaned and dyed,  and the red wooden reinforcements on the underside of the parcel shelf are also originals.  If anything can be salvaged I like to retain it."


Everything Else (Me, Steward for The Alfatross)

When the body and chassis come back to Santa Fe I need to be ready to install all the other components except the upholstery.   Many of them are compete, but there is still plenty left to do.   Jeff Kramer, The Alfatross' chief Web scrounger, recently sent me a link to an ebay ad by Luma di Mazzotti Gianluca for a complete original Alfa 1900 radiator, thermostat, shutter and linkage assembly.  I didn't really need the radiator or shutter, but the thermostat and its intricate linkage alone were worth the purchase. Incredibly, it arrived less than a week later!

The radiator from The Alfatross (right) dwarfs the one
just received from Italy.


I was surprised to discover that the radiator and shutter were shorter than the Alfatross', although the other dimensions were the same.  It made me wonder if Alfa supplied different radiator types for different engines, or whether different body shapes required lower radiator height.
The shutters are sized proportionately.


The wiring harness laid out for testing.  Front of the car is at the top.
One of the other facets of the restoration I'm working on now is the wiring harness.  I had the original duplicated years ago by YnZ's Yesterday's Parts, but until now it had never been laid out.  My intent is to test each circuit and each electrical component to make sure they are functional before installing the harness in the car.  Although the harness and components are relatively simple, there are plenty of opportunities to get wires crossed.  Fortunately, YnZ numbered each wire and supplied 4 pages of notes on what they connect to based on the labels I attached when I removed the original harness and on their years of experience with this sort of thing.  I also had 9 pages of schematics sent to me decades ago by Berge Bergesen, another 1900 Z owner and notes by Peter Marshall on how to improve the exterior lighting system.

Things get a little complicated in the vicinity of the dashboard.

Separation Anxiety

I have to admit to being anxious about how long this restoration is taking.  I am well aware that The Alfatross is not the only car these guys (even me!) are working on, or even their highest priority (except for me!).  Over the 45 years I have been taking care of The Alfatross my experience with contractors has ranged from utter frustration with charlatans to mild amusement over some of the citations from The Book of Excuses I have been offered, to a sense of awe at the knowledge and competence demonstrated by the true professionals.  

If I ever do this again I will definitely establish agreements with anyone I contract with for when their part of the job will be finished.  If a potential contractor cannot or will not do that I will look elsewhere. 


Friday, December 5, 2014

Because of a Nail . . . . (Post # 71)

Because of a nail the shoe was lost, 
Because of the shoe the horse was lost, 
Because of the horse the knight was lost,
Because of the knight the battle was lost 
And because of the battle the kingdom was lost!

The Alfatross in 1969.  The trim ring is missing
from the passenger side headlight.
Chassis 01848 missing trim ring and headlight
lens. www.alfa1900.com.

What do nails, horses, knights, battles, and kingdoms have to do with the Alfatross? Well . . . read on!

The Alfatross was missing the trim ring around the passenger's side headlight when I bought it. OK, big deal, part missing, add it to the list! All I have to do is find another one . . .  or so I thought!
Beautiful car, but where is the trim ring
around the headlight? Michael Marciano.


The culprits: three simple spring steel clips susceptible to
breaking.  
It turned out that finding a replacement trim ring was not as difficult as determining WHY the original was lost in the first place. Headlight trim rings don't just fall off, even during competition or when being chased at high speed by the Polizia.  I noticed that at least a couple of The Alfatross' brethren were also missing their trim rings, so there seemed to be a pattern.  

There is always a reason, but it isn't always obvious. This time it was!  After cleaning the headlight buckets it was apparent that the one on the passenger side was missing two of the three clips that hold the trim ring to the bucket. And the driver side was missing one too.  

In my imagination I could see the series of events leading up to the loss of the trim rings: First, the headlight bulb burns out. The ring has to come off before the lens can be removed.  The person doing the work can't see what is holding the ring on or how to get it off (it isn't intuitive!) and breaks one or more of the clips before finally getting the ring off.  Now there is nothing to hold it in place, so either it isn't replaced, or it is jury rigged and falls off later. 


The exploded view diagram of the Carello headlight assembly for The Alfatross (top).  No. 14 in the diagram, "chiavistello" is the clip, or "latch" that holds the trim ring to the bucket, three per bucket.  Lose two and the ring will not hold!  Peter Marshall.

Looking at the headlight parts catalog sheet Peter Marshall send me years ago I made a feeble attempt to find replacement clips on line using the part number and description. It didn't take long to conclude that there probably isn't a stash of chiavistello "latches" left anywhere on earth so I better get busy making my own.  

I removed one of the three surviving clips still in good condition and took its dimensions. The problem was going to be finding spring steel of the right gauge to duplicate the example.  Shaping, drilling and bending it and would be easy (I thought!).


The nail that lost the shoe!  The 35 mm long, 
24 gauge, spring steel clip.  Try finding this 
on ebay!


The spring steel donor: a 
common paint scraper that 
just happens to be 24 gauge.
Cutting the spring steel blank with an abrasive wheel on
a Dremel tool.  Given the small size of the blank, sawing 
was impractical. 


I tried a number of pieces of scrap metal and saw blades before Jeff Kramer handed me a common paint scraper and said "Why don't you try this?" The blade turned out to be exactly the right gauge and large enough to make 5 or 6 blanks to allow for experimentation.  


Heating the spring steel blank with a MAPP gas torch 
in preparation for bending.


Finishing a new retainer clip on the sanding wheel.  The 
pointed tip must have exactly the right shape or it will be
difficult (impossible?) to get the trim ring off again!
I won't elaborate on all the things that can go wrong when you're cutting, shaping, drilling, heating, bending and grinding pieces of spring steel that are about an inch and a half long, but rest assured that Jeff and I discovered them all.  


One of the fabricated clips (top) with the original example.

This exercise is a good example of why car restoration is so time- and labor-consuming and hence so costly.  The materials in this case cost virtually nothing, but it took days of labor to restore critical parts that may never be seen again.

. . . and all because a tiny piece of steel--about the size of a small horseshoe nail--was lost .  . . .