Gear Fear
One of the potential big-dollar expenses associated with restoring The Alfatross was the transmission. You can't just take a 1955 Alfa Romeo 5-speed transmission to AAMCO and ask them to check the seals, bearings, synchros, and gears. I was afraid there might be bad news inside the box because it was hard to shift back in 1970 or '71 when I last drove it. The ever-resourceful Jeff Kramer recommended I take it to Gordon Self of Gordon's Imports in Albuquerque. Gordon is ASE certified for Alfa, Ferrari and other European imports. |
| The Alfatross' 5-speed transmission, now with new front and rear seals, fresh oil. and a clean bill of health for the bearings, synchros, and gears. |
Gordon looked it over skeptically, ran the shifter through the gears, scratched his head, and said "It's been a long time since I've seen one of these!" It looked pretty good on the outside, anyway. But even if the gears and synchronizers were good it would still probably need seals front and rear at a minimum.
 |
| Gordon Self in his shop with the Alfatross' transmission. As you can see, racing is his thing! |
 |
| The shift bracket welded to the frame had torn loose. |
If everything was fine inside the box, why was I having shifting problems? I discovered the most likely reason when I was soda blasting the bottom of the chassis. A bracket designed to anchor part of the clutch linkage had peeled away from the frame member making it impossible to totally disengage the clutch. That problem was rectified during the chassis repairs.
 |
| 50 years ago to the month, V. Pat Braden, The Alfatross' 5th owner, scratched his initials (VPB) and date (10-64) inside the bell housing, probably during a clutch replacement. |
Carchaeology
An interesting aside: I know when the last clutch change took place: October 1964, 50 years ago to the month, because Pat Braden, a former owner, scratched his initials and the date on the inside of the bell housing!Max Jax
Optimistically looking ahead into the not-too-distant-future when The Alfatross' body and chassis return home from Tennessee, I have been shopping around for some kind of hydraulic lift to help with installation of the engine, running gear, brakes, suspension, wiring harness, etc. I favored a two-post lift because it would make access to the suspension, wheels and brakes easier. I had been putting off buying and installing a lift for a long time. The Shed has 11 ft ceilings, so height is not a problem, and there is plenty of space, but not so much that plunking a permanent lift down in the middle of it wouldn't create problems when reconfiguration of the space was necessary. I discovered this site on the Web, http://www.maxjaxusa.com/, watched the set-up video, and was sold.
 |
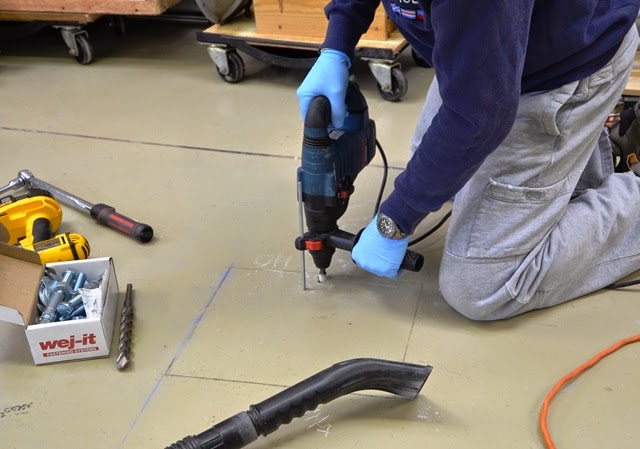
| Installing the MaxJax. The hardest part was deciding where to set it up and how far apart to set the columns to fit a variety of vehicles. |
I placed my order and the unit arrived before the end of the week--all 800 lbs of it. I was surprised and delighted at how easy it was for one person to unpack, assemble, and install it. I did the assembly on a leisurely Sunday afternoon and the installation in less than 6 hours. If I had to do it again it wouldn't take half that long.
 |
| Each of the lift columns bolts to the floor using 5 special wedge anchors. All you need is two masonry bits and a good hammer drill. |


No comments:
Post a Comment